News:

Forum may be experiencing issues.

Main Menu
Menu

Show posts

This section allows you to view all posts made by this member. Note that you can only see posts made in areas you currently have access to.

Show posts Menu

Topics - Marshall Arts

#1
Build Reports / Cheap DIY Bluetooth Page Turner
September 27, 2023, 04:52:03 AM
I haven't posted in years, I think, but I thought you guys might like this one:

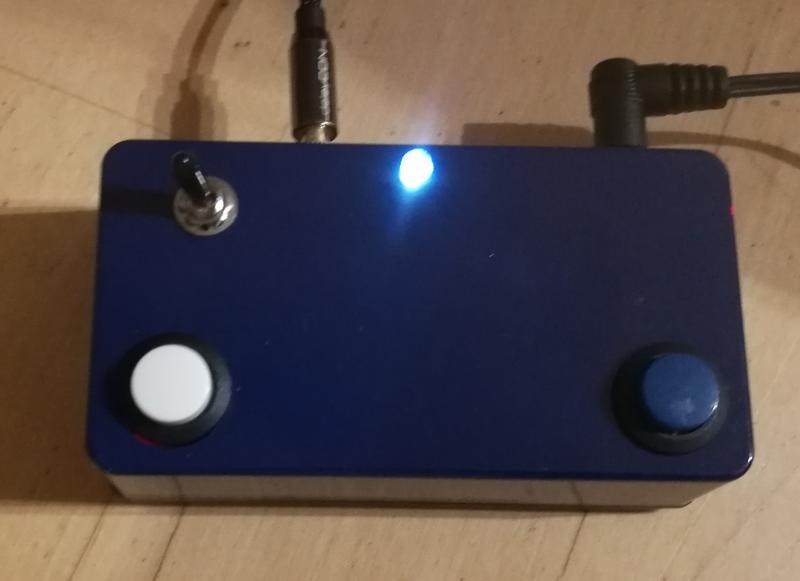
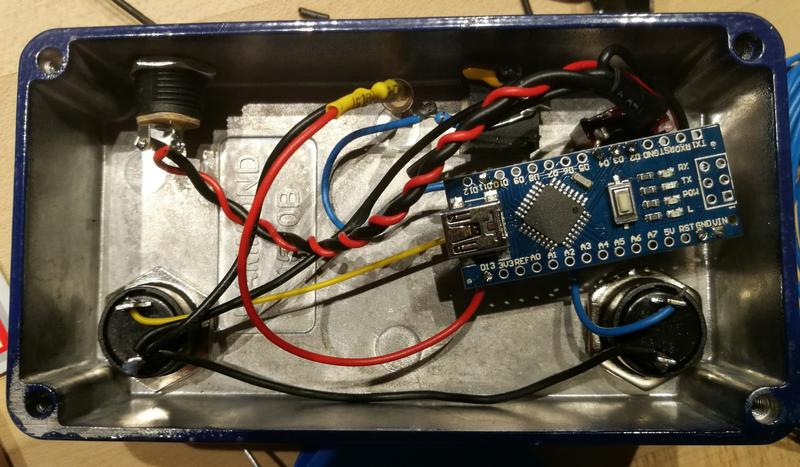
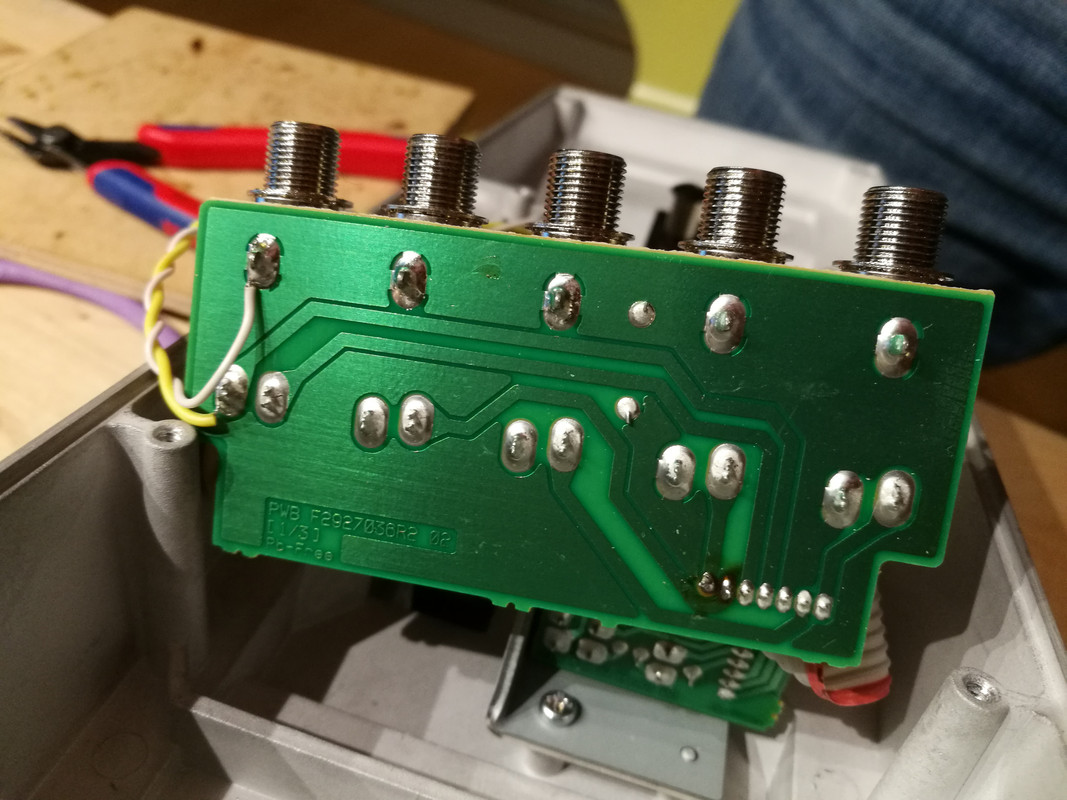
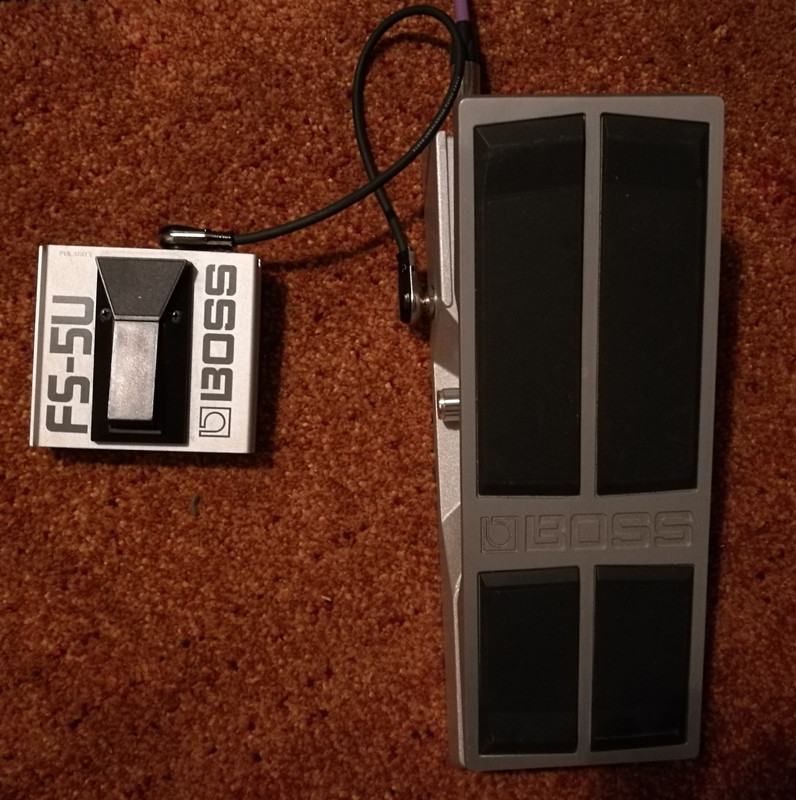
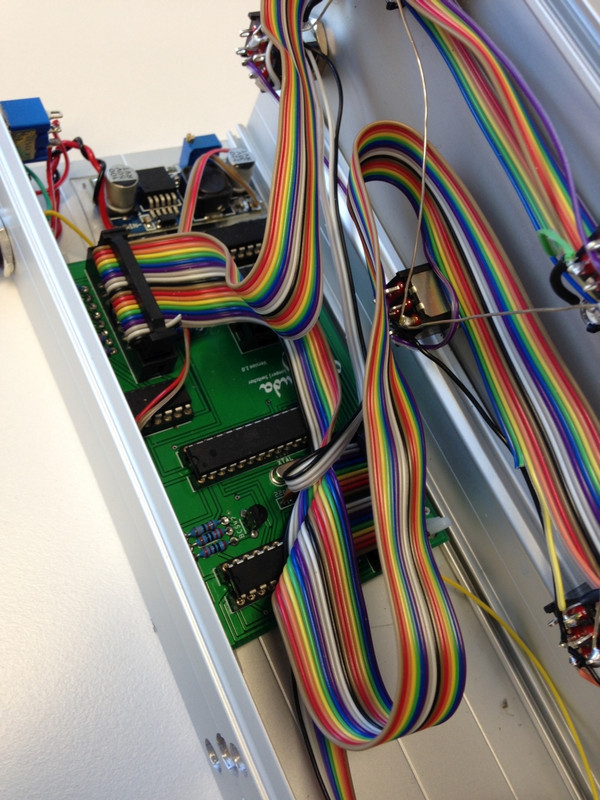
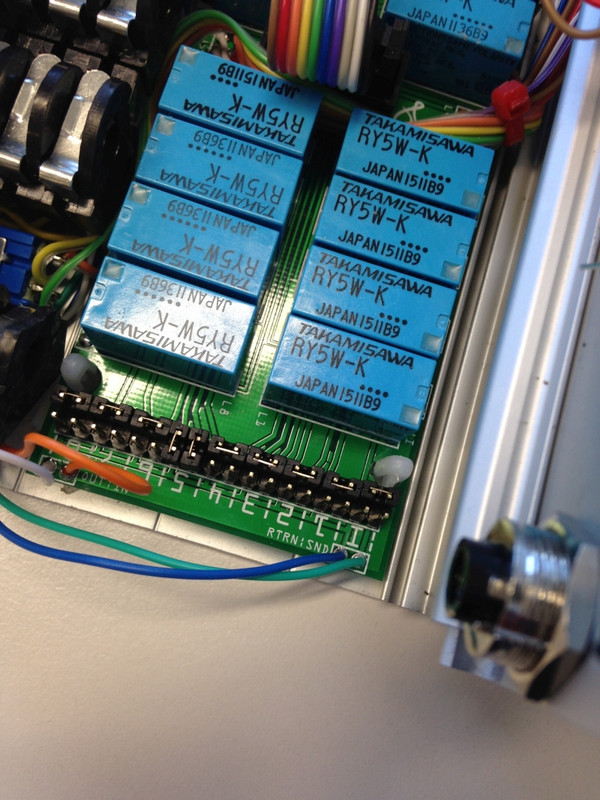
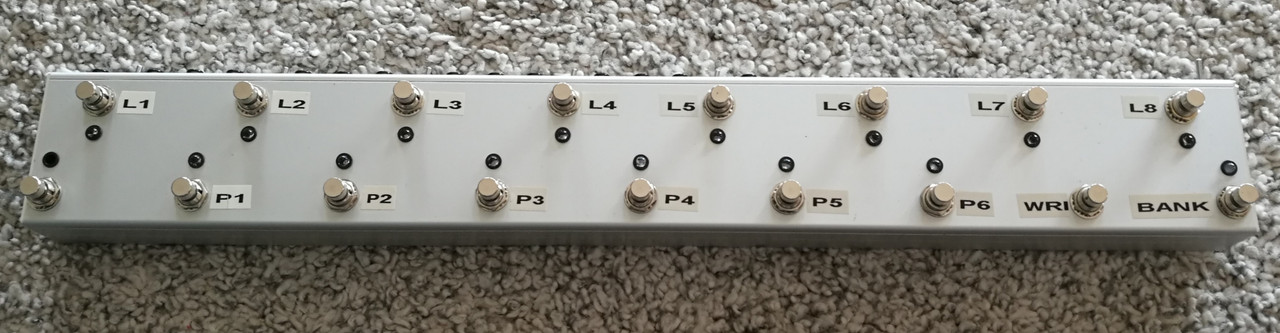
Ever wished to own one of these bluetooth page turners like Pageflip, Airturn, iRig BlueTurn but didn't like the price tag (around 100$)? Years ago, I built this funny-looking prototype in a quick-and-dirty approach which I used for about four years: https://www.madbeanpedals.com/forum/index.php?topic=30108. The only downside besides the looks was, that this pedal went into standby after just a few minutes and I had to wake it up now and then by pressing one of the footswitches.

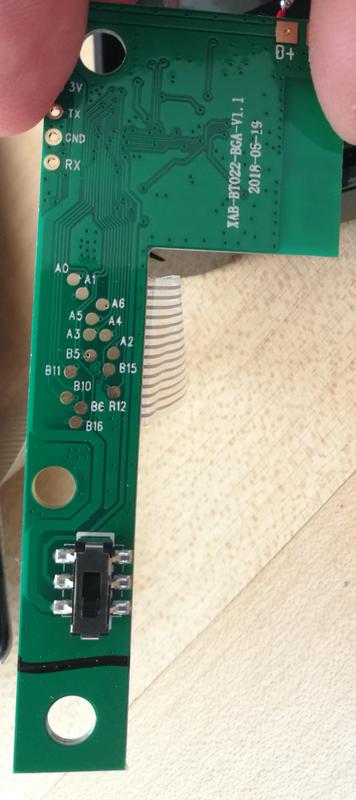
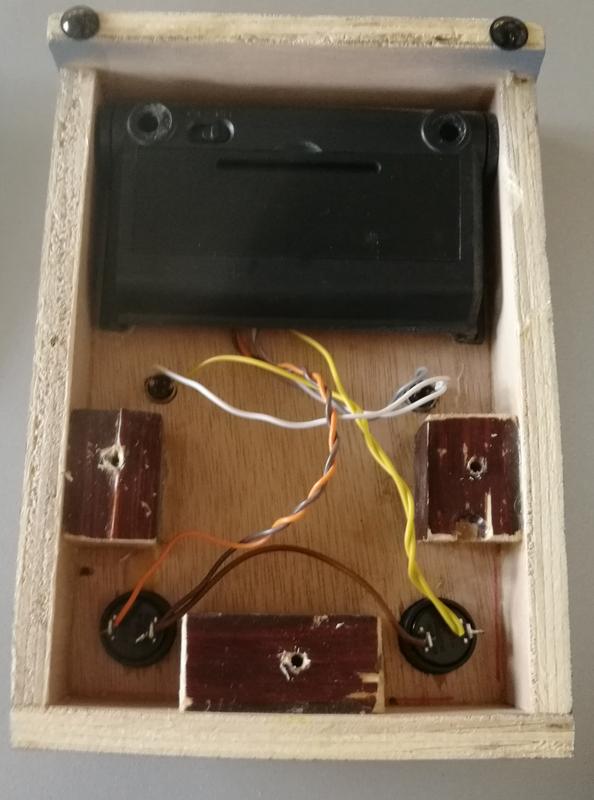
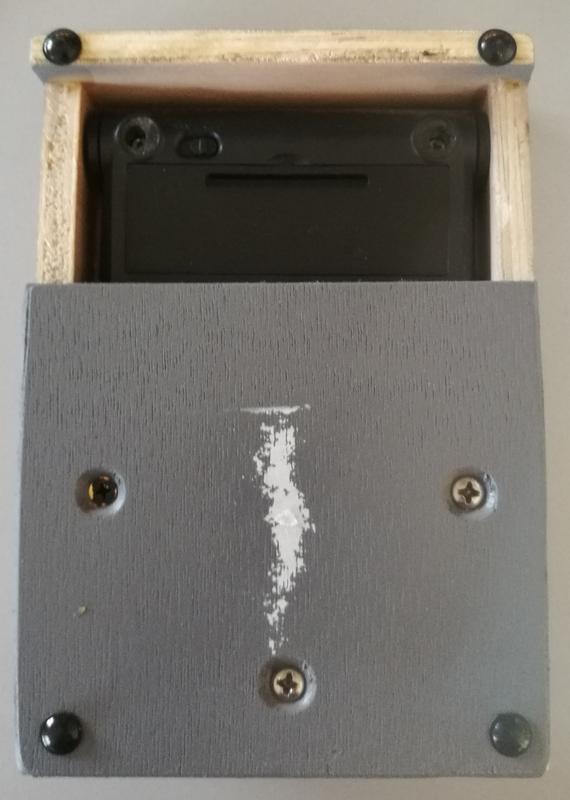
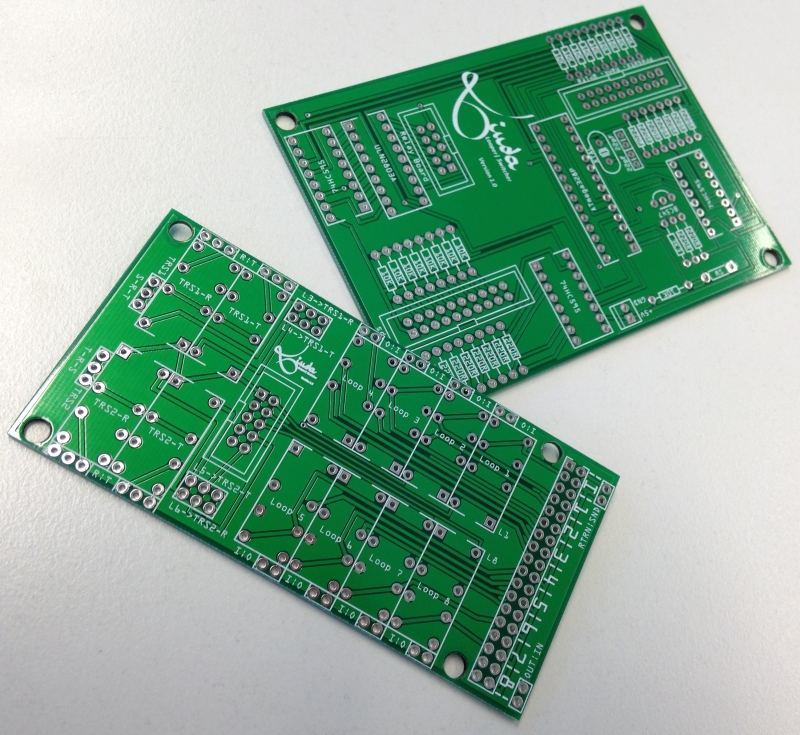
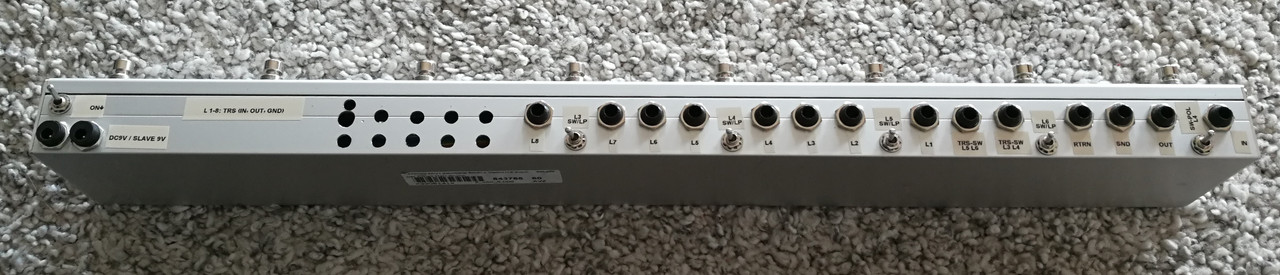
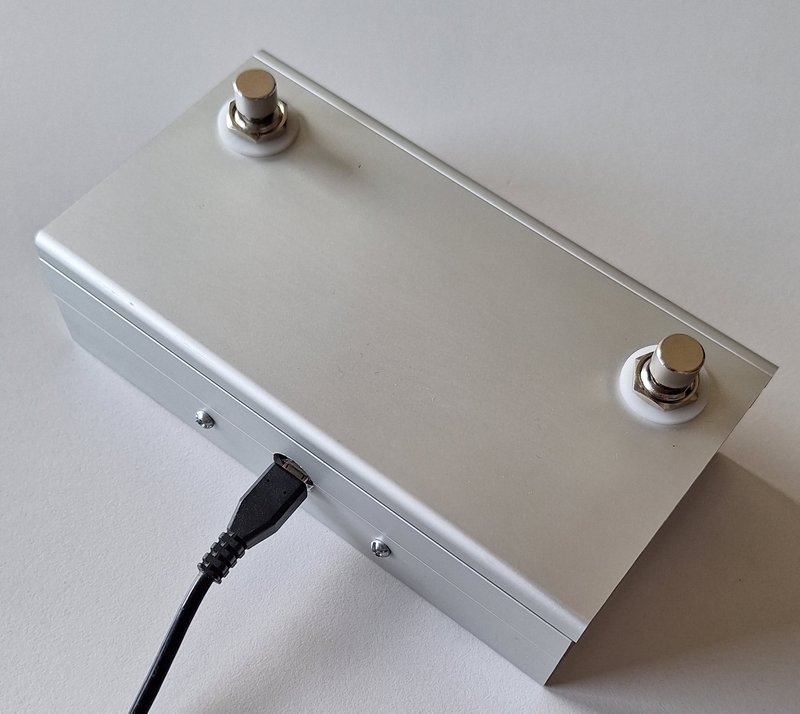
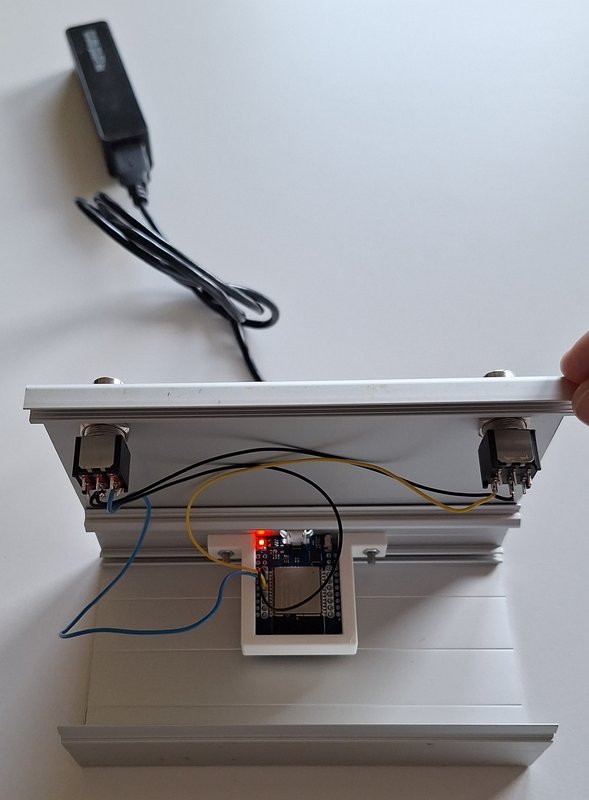
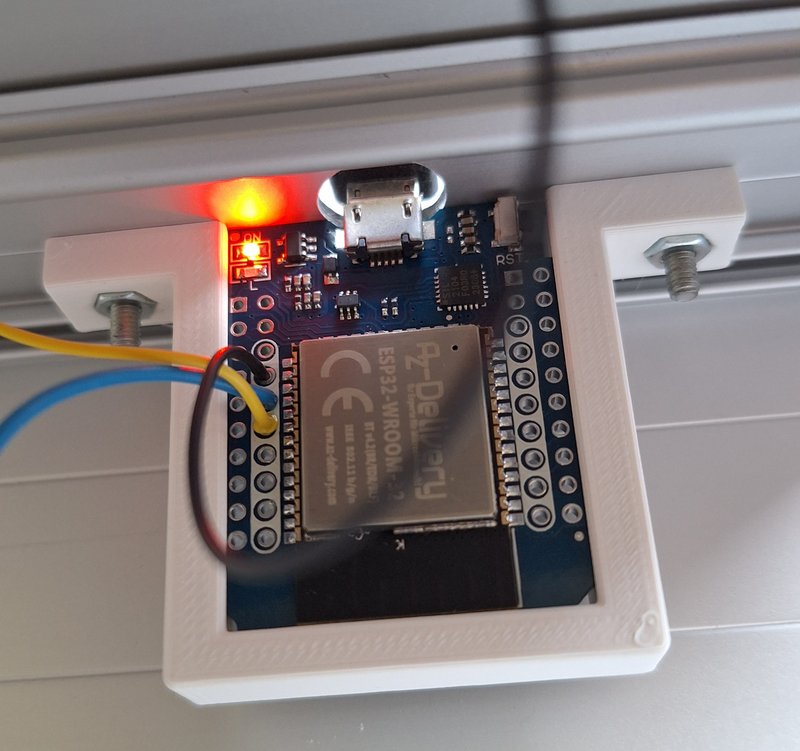
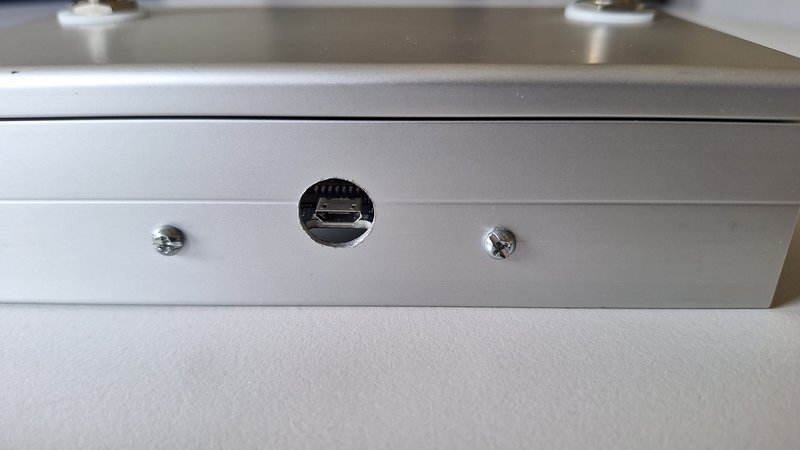
As the wonderful ESP32 chip is available on a Wemos D1 board now (https://makersportal.com/shop/esp32-d1-mini-bluetoothwifi-board), I thought it would be fun to build a new one, better looking and without the standby-issues. It's probably the easiest pedal you can build, less parts than a fuzz, no PCB. I used a 3D-printed frame to hold the Wemos on the backside, it's powered either by a cell phone wall wart or a power bank (will probably run for 40 hours on a 10 Ah power bank).

Arduino code and 3D-Model available (just PM me).


#2
Open Discussion / Self-soldering PCB's
January 20, 2023, 12:29:31 AM
Haven't posted in a while, but this was too good to not let you guys and gals know:

This might be a door opener for more intense use of SMD...

Who will design the first pedal using this process?
#3
I haven't built anything in quite some time, mainly because I am happy with an HX Stomp with an external DIY midi controller feeding the power amp of a trusted tube amp. So, this post is also to document that I am still around  :)

I was in urgent need to remotely activate/deactivate my TC Helicon Play Acoustic live. TC Helicon only provides switches without LEDs, so I build one WITH LED based on a smart switch PCB I designed like 3 yrs ago. The switch shows the urgency I was in ;-)


Now comes the nerdy stuff:
This pedal (like many others) needs a momentary switch to be activated and deactivated. My switch uses a DPDT momentary switch to directly communicate with the pedal (first half) and to interface with an Attiny85 to alternate the LED-Status. I could have used an NE555-based circuit as well, but the board was designed for an Attiny.

Here are some questions:

  • Is there really no commercial pedal that works momentary on the jack and latching on the LED? Hard to believe, but I did not find one.
  • The Helicon needs a TRS-cable. My Switch makes a connection between Ring and Tip, however, I want to use standard cables with TRS on both ends. I use a 9V battery for the Attiny and the LED and would like it to be disconnected  when I pull the TRS plug from the pedal. I only found the very pricey Switchcraft 13 Jack (which is mono, but that's ok) that comes with an "isolated make circuit" switching function. Are there any other Jacks available?

As I have everything more ore less in place and only some programming and PCB-redesign will be required, I will make this into a universal switch. Soft 1PST Switch communicates with the Attiny, which controls a relay and an LED. Operation modes can be toggled between the following modes:

  • Jack Momentary, LED Momentary (a real momentary pedal with LED e.g. for momentary effects)
  • Jack Momentary, LED Latching (what I need for the Helicon)
  • Jack Latching, LED Latching (a real latching switch e.g. for classic tube amp channels)
  • Hybrid Mode 1: Momentary, if you hold the button for e.g. a second or more (will go off at release of the button), Latching switch, if you press the button short (will go off on the next button press).
  • Hybrid Mode 2: Same like Hybrid Mode 1, but working with pedals that only expect momentary impulses to toggle. So I can use the Harmonizer in the TC only for a few seconds (e.g. in a verse) by holding the buttons down or for longer periods (e.g. the full chorus) by switching it on at the beginning of the chorus and off again after the chorus.

The new design will have the "invert" button as well to invert the behaviour of the LED. Any other suggestions on what a switch could do before I start programming?
#4
(updated message to represent the functions implemented in the current version)

I have build a MIDI controller to control my HX Stomp. I call it the "Evening Sun MC6" ;-)


  • 6 Buttons
  • 4-line display
  • arduino-based
  • programmable

Components required:

  • Display: HD44780 LCD (4 lines, 20 collumns)
  • Enclosure: Hammond 1590 XX
  • 6 Soft Switches (momentary)
  • Arduino Nano
  • No addional PCB required

Total costs for these are below 50 €.

Features:

  • Programmable: Less easy than e.g. a Morningstar MC6, so no web editor. Changes have to be done in the arduino code (via USB), but the structure of the code is really easy to understand.
  • Five modes/banks for various combinations of button functions. It can easily be changed by users to provide more banks, if required.
  • Everything is customizable, including the display text (and of course the midi messages)
  • Unlimited number of Midi Messages with each footpress (only limited by the default memory of the arduino, which should be more than sufficient)
  • Two functions per button: Single click and Longpress
  • Optional (series) of Midi Messages to be send when a new bank is selected, e.g. to activate a specific preset on the target device(s).
#5
Build Reports / Powerful Pedalboard Amp in a 1590B
October 03, 2020, 07:54:40 AM
I was looking for a versatile, yet simple pedalboard amp. This one uses a TDA7266M IC and a simplified ROG Tonemender as a preamp / tone stack. Controls are Treble (bottom right), Mid (bottom left), Bass (top left) and Volume (top right). The tiny hole below the controls can be used to contol the overall preamp volume (there's a trim pot below that). The thing runs on 12 volts, but 9 volts work as well if enough current can be provided by the power supply.

Soundwise, I could not be more happy - the tonestack is effective, the overall volume is way to loud to practice.

All that in a 1590B package with top mounted jacks.


I had to bend the TDA7266M to fit in the box, which I did before soldering it on the pcb. I put a little piece of wood between the pin rows, put it in a vice and bent the plastic part back. Unfortunately, the footprint for the TDA from the internet had too tiny holes to push the pins through. They went in, but not through. Not a big deal.

I have a few PCBs left and can provide a BOM and even a drill template. PM me, if you are interested.
#6
Build Reports / Steve Stevens Ray Gun
August 13, 2020, 04:44:45 AM
It's been at least a year since I searched for a ray gun (circuit) that sounds similar to Steve Steven's signature "Rebel Yell" sound (we play that in a cover band). They are impossible to find, most of them are way too digital/modern sounding and cannot be tuned (in terms of LFO rate).

IT seems, my search is over - check this out!


Here is another one with the same circuit.
#7
Build Reports / Aion L5 LabSeries
March 21, 2020, 12:14:36 PM
Awesome, my BOTY 2020 price - thanks, Kevin!

I like it better as a preamp than as a pedal. First shot is my preset in stompbox mode, second one in preamp mode (less compression required, higher master volume).


Some comments:
- Mouser ran out of the recommended Nichicon power caps - Try the Panasonic FP series for an equivalent ripple!
- Substitutions: OPA134 for LF356N, NJM2068 for RC4558P
- First time I orderded at Mouser: Shame on you, Mouser, what a waste of bags (giant plastic bags, often with second bags inside for a single resistor). Other suppliers use less than the half plastic waste.
#8
Open Discussion / EasyEDA vs. Eagle
March 08, 2020, 07:46:50 AM
Haven't designed something for about a year... before setting up Eagle (now part of Fusion 360), my libraries and my scripts, I was wondering, if there were alternatives available and stumbled over EasyEDA. I played around with it for two hours or so and found the libraries to be quite good (checked for some parts, usually only used by stompbox builders, e.g. BTDR reverb bricks or PT 2399 delay chips).

Findings so far:
- Schematic drawing is cool enough for me
- Placement of components is ok as well
- Online Autorouting seem to be limited, but there is an option for a browser plugin (need to check)
- I think there is no limitations in terms of PCB sizes (I might be wrong).
- Visualization of the PCB is available (probably including components)

Anybody who migrated to this online tool? There is an installation version available as well, which I haven't tried...
#9
Trying to become a better guitar player, I often draw scale patterns on fretboard templates. Depending on the context, I sometimes want to highlight note names, intervals or colours (sometimes all of these). Yesterday, I discovered this little free tool, which can do everything I ever needed:

https://guitarscientist.com/generator/

Example? I am trying to learn hybrid scales (e.g. minor pentatonics with mixolydian) and use half-diminished scales for specific blues transitions (I->IV and V->I). Here is what I created with it: http://www.guitarscientist.com/generator/vg087QDkdNwLrG1 (Minor bug: It does not seem to remember the notation for the "6" and displays it as "bb7". You can change that in the notation tab at the bottom).

If you have other recommendations for good online tools that you really use, it would be great if you could post them here.
#10
Playing on small events or in tiny rehearsal rooms comes with a problem: People can trip over the jacks and destroy them. The problem does not occur so much on a stage, where the back side of your pedal board is usually facing the edge of the stage.
Here is a picture of my patch bay that shows the problem:


I was searching for a commercial solution, but it seems, that all patch bays/connectors for pedalboards ignore that problem.

So, here is my approach: I flipped the patch bay by 180 degrees and made a cutout on the side of the pedalboard for the multicore (4-cable-method) and the guitar cable. I will later use 3D-printed parts to fix the multicore in the slot.


I know that my board is somehow special, but maybe this setup does inspire you guys.... Any other ideas welcome.
#11
Build Reports / Auto 808
September 29, 2019, 01:00:47 PM
Can anybody explain to me, why the two of the most iconic devices in music electronic have an "808" in their product name? Anyway, the "Auto 808" is referring to the TR-808 Rythm Composer, not the TS-808 Tube Screamer ;-).

Background story: I sometimes play a foot stomp with my acoustic guitar (basically a number plate with a bass pickup below it) to add some "four on the floor" beats. However, I was always looking for something more automatic, where I tap in the tempo and the thing keeps going... Than I saw the documentary "808 - the heart of the beat that changed music" (https://en.wikipedia.org/wiki/808_(film)) during vacation and thought, that an 808 bass drum and some arduino control might do the trick. I designed taprecise (a tap tempo control for PT 2399 based delays, http://www.madbeanpedals.com/forum/index.php?topic=22653.0) before, so I knew that this would not be too complicated. Initially, I wanted to build the analog bass drum circuit from the 808, but than I found out, that you can use the PWM output to play samples. And somebody had already designed a polyphonic (!) arduino sample player with 808 samples (https://hackaday.com/2016/02/23/a-slew-of-open-source-synthesizers/). The sample quality is not brilliant, but it's absolutely ok for the purpose.

The Auto 808 has a white tap tempo button and a blue "mute" button. Tempo can be tapped while the thing is muted, the LED will indicate the beat. Once the tempo is set, I can unmute the Auto 808 and it will start straight on the press of the blue button.

When the switch is set to the left, the device is in manual mode - the white button will trigger a bass drum sound each time it's pressed (so, basically it will work like a foot stomp). There is no latency (the samples are played via interrupt).

Output is a mono 3.5 mm jack, as it will be connected to the AUX in on my "TC Helicon Play Acoustic Live" (which is also 3.5 mm, so I don't need an adapter cable).


I liked the breadboard version from this morning so much, I decided to build it straight away and not make a PCB for it. With only a few offboard components, it may not look nice from the inside, but it's a great practice tool and a powerful bass drum companion.
#12
The topic says it all. This is (obviously) not to show off any special skills, I just wanted to quickly build something really cheap and did not want to pay 60 bucks or more on an Airturn or Blueturn. Here is how I did it, in case somebody is looking for something similar, this will save you a lot of time for reverse engineering the keypad logic...

Start with this keypad (only the packaging is left...):


Remove the keypad from the main PCB (you can slide it out or simply cut the transparent "cable")


Cut off the plastic enclosure below the battery compartment (already glued in the enclosure and wired in the picture)


Solder wires to the PCB to the connections A3, A6, B5, B10, B15. I chose the following colours:
A3=White
A6=Brown
B5=Yellow
B10=Grey
B15=Orange

For the offboard wiring, the following connections send the corresponding keypress:

A6-B15="6/go right" (brown/orange in my build)
A6-B5="4/go left" (Brown/yellow in my build)
A3-B10="Bluetooth connect" (white/grey in my build)
A3-B5="Toogle Num Lock" (white/yellow in my build)

The last two are only needed to bind the pedal to a new tablet/notebook/mobile phone or to change to cursor mode, should the device ever come up with num-lock activated (it actually has not so far...)

The back lid allows for access to the batteries and the on/off switch:


The front side could not be more "Quick and Dirty DIY":
#13
Just checked for international shipping rates, as my Eoo3 packages are a bit heavier and thicker than usually. Seems like the difficulties you guys had with the change in the USPS rates some time ago now strikes in Germany as well:

https://www.deutschepost.de/de/b/briefe-ins-ausland.html

Google translates:
"From 1.1.2019 only documents in letters can be sent abroad. For the dispatch of goods business customers can use the goods post internationally, private customers please use for goods abroad the DHL Päckchen International (NEW: starting from 4,89 €) or the package International."

That means, that from the beginning of 2019, a single PCB from Germany comes with a shipping fee of at least (!) 4,89 Euro for EU-recipients and 8,89 Euro.

Phew!
#14
Open Discussion / Connection plugs for PCB holes
March 19, 2019, 06:19:12 AM
Someone here posted an image about some sort of plug that fits into the holes for through-hole-components, which would be perfect for evaluating component values without having to put solder in the holes. I just dont find it any more... any help is welcome!
#15
I would like to protect a circuit that

  • runs at regular 9V and
  • requires around 400 mA max
against reverse polarity and over-voltage. Would this circuit work for all these purposes?


The circuit can run safe with 10 Volts for some time, so component-wise, I would choose a


  • Zener Diode with 10 Volts, 5 Watt and a
  • Fuse with Ihold=0,5 A  and Itrip=1A.

Would the fuse sufficiently protect the zener? My understanding is, that the fuse will increase resistance when current is over 1A (e.g. in a reverse polarity situation, where current flows freely through the Zener) and "open" within 4 seconds. I am having a hard time estimating, if the Zener will survive this.

With Voltage >10 Volts, the Zener will open up in reverse direction, thus protect the circuit behind it. Fuse will also "open" within 4 seconds.
#16
I don't know, if this has been described somewhere else, but I thought I'd share it. I wanted to use my Line6 HX Stomp with an existing volume pedal (Boss FV-500-L) and a momentary footswitch. To use the expression output of the volume pedal alone with the HX, no modifications are required, just make sure you use a TRS (stereo) cable (mono - TS - won't work). If you want to use an additional footswitch (which will show up as FS5 (!) in the HX) you need to get hold of the ring and the sleve of the TRS cable and connect a momentary footswitch. I found the easiest way to do it was to add a mono (TS) jack to the volume pedal and connect it to the jack PCB as shown.

Don't be irritated by the dc jack I also added to the pedal: I added a buffer to the pedal as well, but the mod for the HX is completely passive / does not require power.


#17
General Questions / PCB-Panelization / ITEAD / Elecrow
November 14, 2018, 12:09:53 AM
I am working on a design, where I need various smaller printed ciruit boards (PCBs), e.g. a dozen sub-pcb for a dozen seperate LED/Footswitches, one sub-pcb for the input buffer mounted directly on the input jack, a relay-pcb and so on. I usually use ITADs prototyping service for PCBs but never had this requirement. Now I found this:

http://support.iteadstudio.com/support/solutions/articles/1000160585-pcb-panelization-rules

With a total of approximately 20 small PCBs for one build (it's a looper pedal with a lot of switches, relays etc.), I obviously need exactly what they describe as not possible or more pricey (in the context of prototyping PCBs)

Questions:
- Does anybody have experience with them? Are they really charging extra for a couple of slots in my PCBs?
- I would actually like to stay with ITEAD, as I know that they make working PCBs from my files. Nevertheless: Any recommendations for another PCB-fabbing-service, that is not so picky?
- Technical: I've seen some devices, where the boards chip off really nice (e.g. the Cascadia overdrive). Any hints on a good combination of drill hole diameters, distance and PCB thinckness is welcome.
#18
Build Reports / Dirt Pedal Shootout for Board Redesign
November 10, 2018, 05:52:59 AM
The title says it all. Using my Looper to swap and Compare:

Left bottom to top right:

Katana boost (not in Looper)
Cascadia overdrive
Rog umble
Zendrive
Super tube screamer
Aion fractal
Ego driver / ocd
King of tone
Brown betty
Bsiab/Diablo mash up
Ge7 (not in Looper)


Winner(s) will go back on my currently naked board...

#19
I am trying to design a DPDT-Relay-based bypass box for a delay. This bypass should provide two selectable modes: Either true bypass or buffered with spillover/trails. The mode can be selected with Jumpers or dip switches, for the switching I want to use the same relay, independant of the mode.

Best shot so far was this:


The Relay would be FX/BP1 and FX/BP2, the mode jumpers would be TB/BUF1, TB/BUF2, TB/BUF3. Not sure if it would work, as I am not sure, if the remaining connections in true bypass mode (via C3) would impact the input signal significantly. Also, I would like to ground the FX input in bypass mode (which seems to be impossible?!)

Haven't come up with a better idea yet, though it must be possible: The TC Flasback uses a single dip switch to change modes and I am sure they did not put two relays in there...

Feedback or questions welcome.
#20
This is basically an arduino looper for eight loops with the ability to store 12 presets. It can also be used to switch up to 4 amp functions (required for my Engl Ironball). For another amp (Marshall 2554), I needed an additional switch to change the polarity of one of the switches (so the LED is lit, if the hot channel of that amp is activated).

Anyway, I built it already in 2015, resurrected it today from the basement and shockingly found out that I never labelled it, so I had to reverse engineer what the 6 mini switches, 17 footswitches and 14 jacks were for. So, the only reasons to post it now is twofold:


  • I think, it got lost in a forum crash years ago.
  • Remember to label in time, if you ever build something that big.

Eye-candy:


...and the way it looks today: