News:

Forum may be experiencing issues.

Main Menu
Menu

Show posts

This section allows you to view all posts made by this member. Note that you can only see posts made in areas you currently have access to.

Show posts Menu

Messages - Marshall Arts

#1
Build Reports / Re: Cheap DIY Bluetooth Page Turner
September 28, 2023, 05:19:46 AM
Quote from: jimilee on September 27, 2023, 01:09:32 PM
That's what I was thinking it was. I just wanted to make sure. Thank you.
Glad that was answered, I was afraid I picked a bad term (i.e. something political incorrect). Sorry, non-native speaker here.


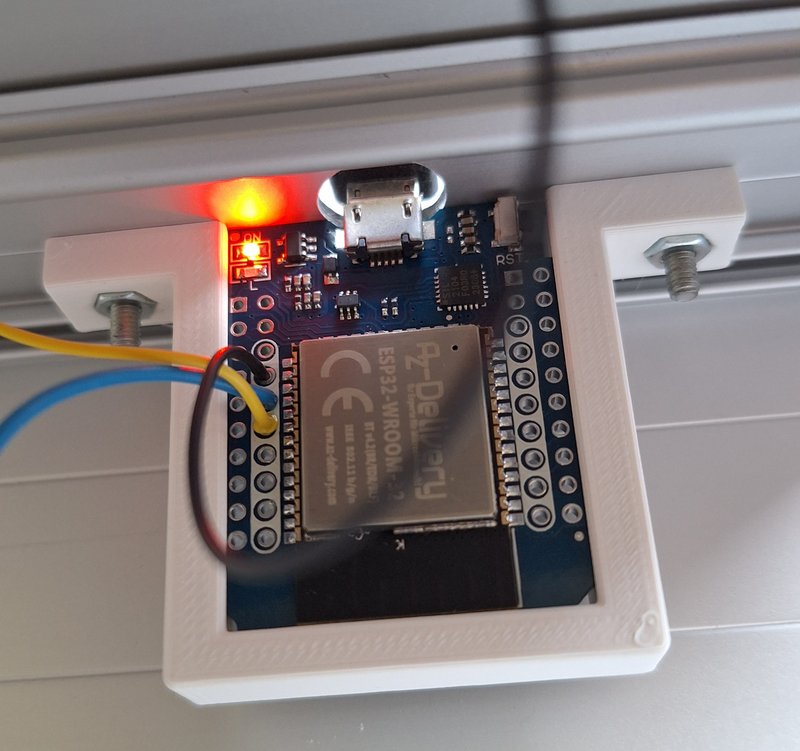
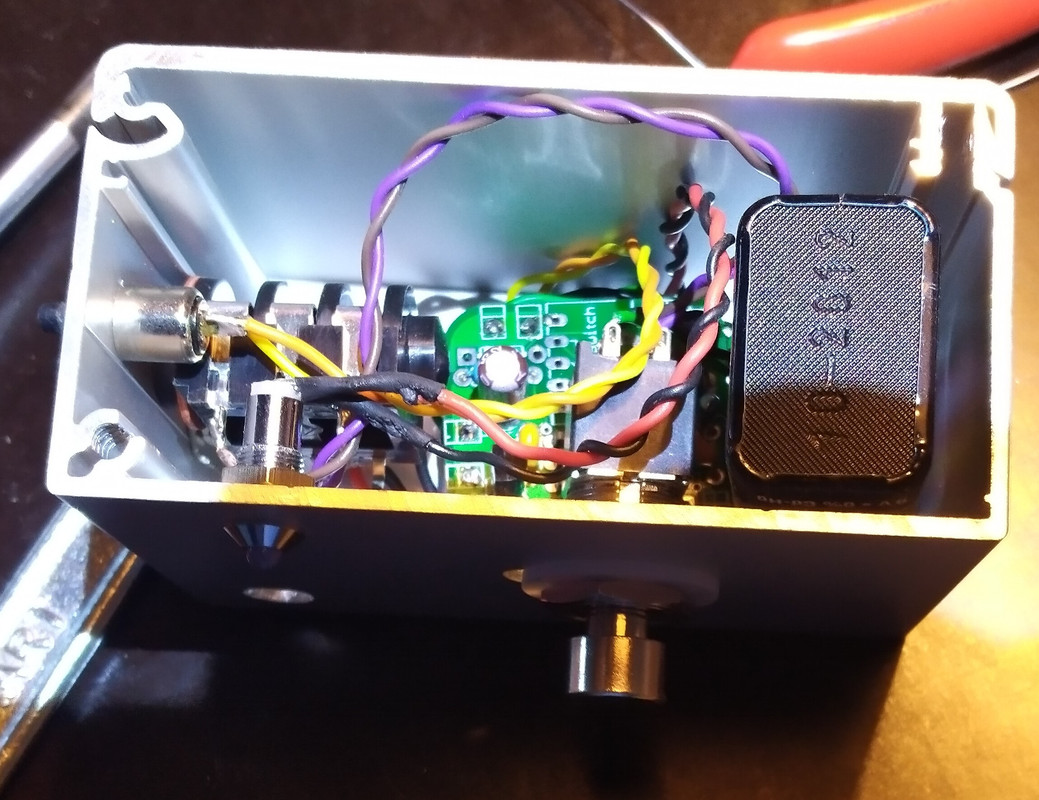
Quote from: nzCdog on September 27, 2023, 12:53:11 PM
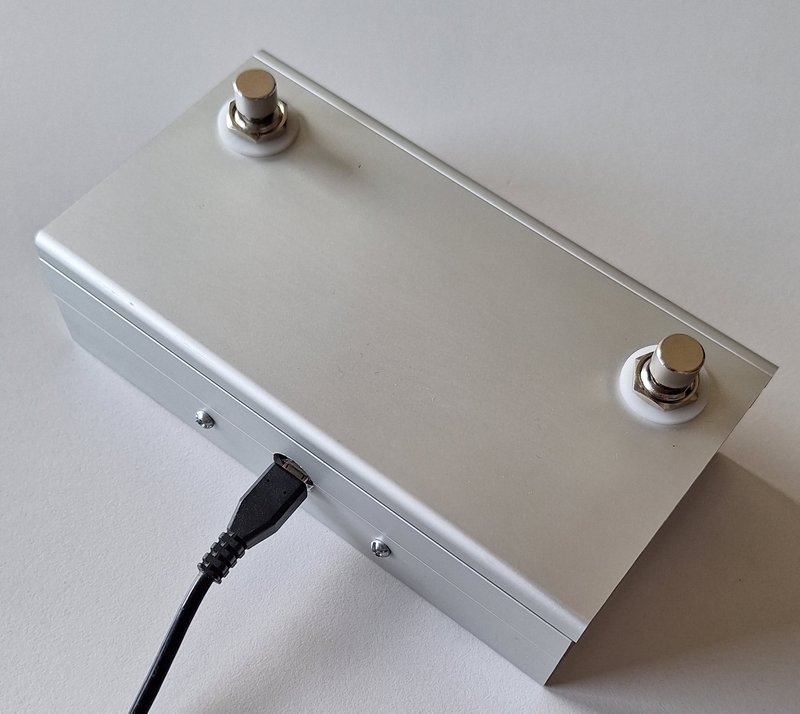
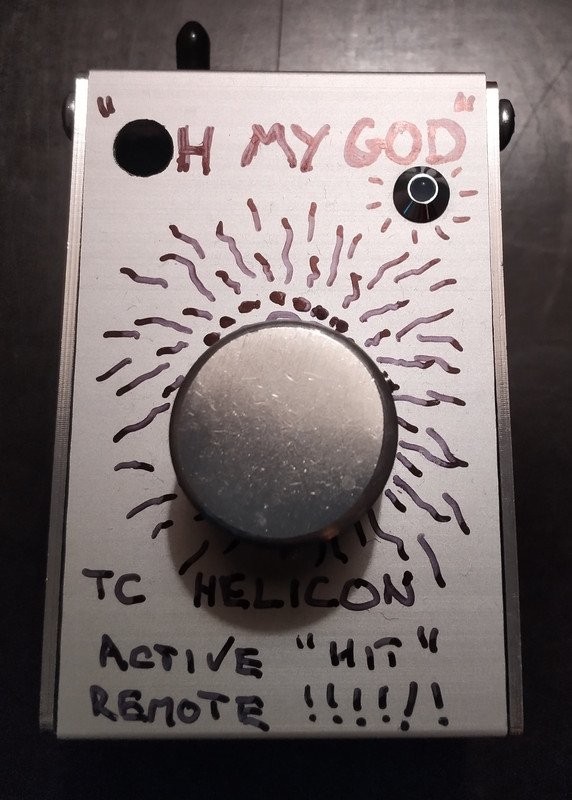
Great idea... and looks slick in that enclosure.  Well done!
I am a geek for micro controller stuff... Bought a couple of Raspberry Pi Pico wireless boards a while ago, need to dig em out & have a play!
Those come with Bluetooth as well - even cheaper choice! Never tried these!

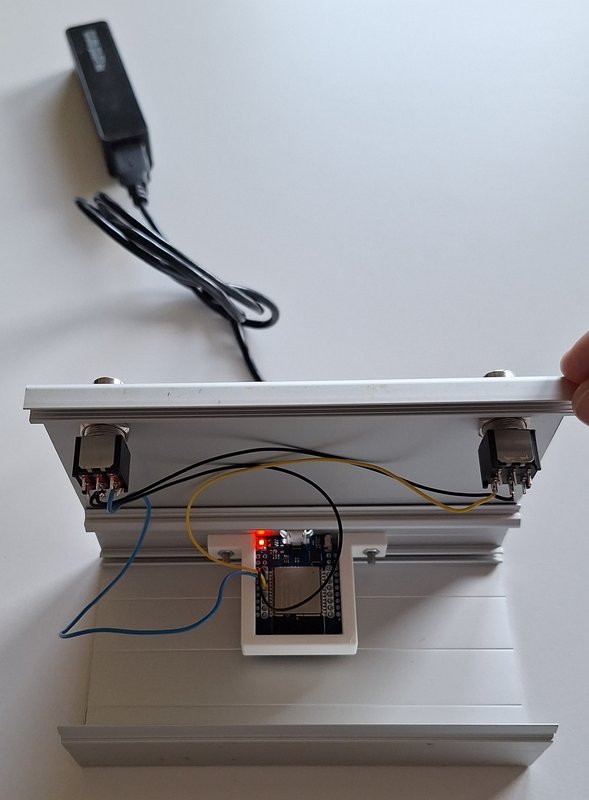
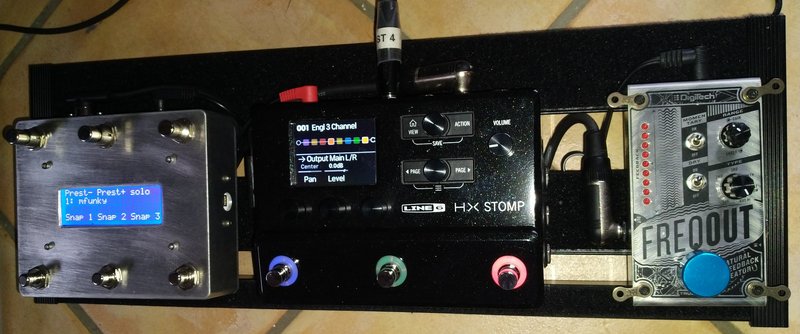
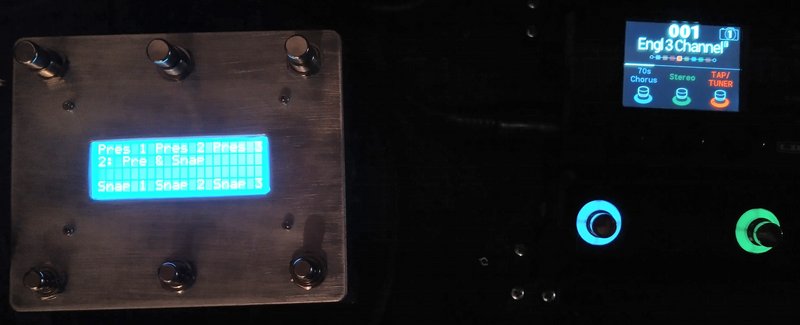
Quote from: gordo on September 27, 2023, 05:27:41 PM
I need this.  I use the IK Blue Turner because it works so slick with Planning Center.  I'd rather rock a homebuilt alternative though.

And I like Marshall Arts projects :-)
Thanks, gordo - great to still "see" you around here ;-). I use this for an app called "SongbookPro" and it works just perfect. After all, it's just emulating a bluetooth keyboard with two buttons.

Quote from: BricksnBeatles on September 27, 2023, 06:36:37 PM
Really rad! I've always wanted to build a page turner pedal since they're so neat, but I don't have an iPad to use it with so it would be kinda pointless lol
Honestly, I use this on a 100€ Chinese Android Tablet with a seperate google account with nothing else installed on it. No Mail, no Calendar, no nothing. And it works perfectly for my purposes (lyrics, chords, tab snipplets, notes)

#2
Build Reports / Re: Cheap DIY Bluetooth Page Turner
September 27, 2023, 04:53:08 AM
P.S. It does come with side walls ;-)
#3
Build Reports / Cheap DIY Bluetooth Page Turner
September 27, 2023, 04:52:03 AM
I haven't posted in years, I think, but I thought you guys might like this one:

Ever wished to own one of these bluetooth page turners like Pageflip, Airturn, iRig BlueTurn but didn't like the price tag (around 100$)? Years ago, I built this funny-looking prototype in a quick-and-dirty approach which I used for about four years: https://www.madbeanpedals.com/forum/index.php?topic=30108. The only downside besides the looks was, that this pedal went into standby after just a few minutes and I had to wake it up now and then by pressing one of the footswitches.

As the wonderful ESP32 chip is available on a Wemos D1 board now (https://makersportal.com/shop/esp32-d1-mini-bluetoothwifi-board), I thought it would be fun to build a new one, better looking and without the standby-issues. It's probably the easiest pedal you can build, less parts than a fuzz, no PCB. I used a 3D-printed frame to hold the Wemos on the backside, it's powered either by a cell phone wall wart or a power bank (will probably run for 40 hours on a 10 Ah power bank).

Arduino code and 3D-Model available (just PM me).


#4
I am still here, guys :-)
#5
Open Discussion / Self-soldering PCB's
January 20, 2023, 12:29:31 AM
Haven't posted in a while, but this was too good to not let you guys and gals know:

This might be a door opener for more intense use of SMD...

Who will design the first pedal using this process?
#6
Open Discussion / Re: Zoom. Zooooooooooom. zoom us?
August 03, 2022, 08:08:52 AM
I would participate, if it would be an acceptable time for Berlin Time Zone ;-)
#7
Quote from: Aentons on May 04, 2022, 08:02:27 AM
Tails

Unfortunately, its just a remote, not a bypass switch. No audio signal going through this...
#8
I haven't built anything in quite some time, mainly because I am happy with an HX Stomp with an external DIY midi controller feeding the power amp of a trusted tube amp. So, this post is also to document that I am still around  :)

I was in urgent need to remotely activate/deactivate my TC Helicon Play Acoustic live. TC Helicon only provides switches without LEDs, so I build one WITH LED based on a smart switch PCB I designed like 3 yrs ago. The switch shows the urgency I was in ;-)


Now comes the nerdy stuff:
This pedal (like many others) needs a momentary switch to be activated and deactivated. My switch uses a DPDT momentary switch to directly communicate with the pedal (first half) and to interface with an Attiny85 to alternate the LED-Status. I could have used an NE555-based circuit as well, but the board was designed for an Attiny.

Here are some questions:

  • Is there really no commercial pedal that works momentary on the jack and latching on the LED? Hard to believe, but I did not find one.
  • The Helicon needs a TRS-cable. My Switch makes a connection between Ring and Tip, however, I want to use standard cables with TRS on both ends. I use a 9V battery for the Attiny and the LED and would like it to be disconnected  when I pull the TRS plug from the pedal. I only found the very pricey Switchcraft 13 Jack (which is mono, but that's ok) that comes with an "isolated make circuit" switching function. Are there any other Jacks available?

As I have everything more ore less in place and only some programming and PCB-redesign will be required, I will make this into a universal switch. Soft 1PST Switch communicates with the Attiny, which controls a relay and an LED. Operation modes can be toggled between the following modes:

  • Jack Momentary, LED Momentary (a real momentary pedal with LED e.g. for momentary effects)
  • Jack Momentary, LED Latching (what I need for the Helicon)
  • Jack Latching, LED Latching (a real latching switch e.g. for classic tube amp channels)
  • Hybrid Mode 1: Momentary, if you hold the button for e.g. a second or more (will go off at release of the button), Latching switch, if you press the button short (will go off on the next button press).
  • Hybrid Mode 2: Same like Hybrid Mode 1, but working with pedals that only expect momentary impulses to toggle. So I can use the Harmonizer in the TC only for a few seconds (e.g. in a verse) by holding the buttons down or for longer periods (e.g. the full chorus) by switching it on at the beginning of the chorus and off again after the chorus.

The new design will have the "invert" button as well to invert the behaviour of the LED. Any other suggestions on what a switch could do before I start programming?
#9
I wrapped this up for my live rig:


I will most likely stick with the configuration in bank one (3 Snapshots on the bottom row (buttons D-F), scroll HX presets up/down (buttons A/B) on the top row and a solo boost (Button C). This means, I will not change the code over in the near future, but document it well enough for everyone else to adjust it to their preferences. You can find it here:

https://github.com/mfunky/Evening-Sun-MC6

Dont hesitate to ask questions, if you have trouble getting into it.
#10
Quote from: gordo on October 19, 2021, 05:51:54 AM
That's too cool.  Have you used it direct to front of house?  I'm already using in-ear monitors so it wouldn't be a drastic change to not "feel" the cabinet.

No, I am still kinda oldschool in terms of "feel". I read that Steve Stevens is using wazacraft cab sims on stage now, so maybe it's time for me to think about in-ears and cab sims as well....
#11
Quote from: gordo on October 18, 2021, 04:53:03 PM
English is better than mine and it's my native tongue.  My wife accuses me of mumbling...

Damn, everytime I build one of your projects it drags me back to the fact that I want an HX Stomp.  I just don't want to pay for it :-)

This project might be the tipping point...

Thanks... You SHOULD get one... Mine goes straight into the return jack of an Engl Ironball. I dont miss the amp's preamp, and that means something...

Here ist the new setup:

#12
It's done and it's working great! Besides the Arduino Nano and the LCD Display, there's only two resistors, six switches, a Midi Jack and a power jack - that being said, I decided to build this without any additional PCB. The wiring can be found below. I will wrap up the code and put it on github later this week. As a special bonus, I will provide the 3D-printed parts (the Nano holder, so you have access to its USB port and the display pcb standoffs/distance tubes).

If you build this, make sure you have some 2.5 mm nuts and bolts available (I bought this one: https://www.amazon.de/gp/product/B075WY5367/ref=ppx_yo_dt_b_search_asin_image?ie=UTF8&psc=1)


Video, please excuse my bad English:
#13
Enclosure preview:


Not sure where I will put the Arduino itself and how to attach it to the enclosure. I would like to make the USB-Port of the arduino accessible from the outside for Program upload, so there will be another hole on one of the sides or the front.
#14
It's coming together nicely. Got a 2 line display working, waiting on a 4-line LCD-Display for more comfort. Midi is working as well. Here is a preview of two banks I programmed as a proof of concept:


Each of the six buttons can be clicked or pressed long and will trigger midi events (or a series of midi events). There will also be a (series of) midi events fired when a bank is changed.
#15
(updated message to represent the functions implemented in the current version)

I have build a MIDI controller to control my HX Stomp. I call it the "Evening Sun MC6" ;-)


  • 6 Buttons
  • 4-line display
  • arduino-based
  • programmable

Components required:

  • Display: HD44780 LCD (4 lines, 20 collumns)
  • Enclosure: Hammond 1590 XX
  • 6 Soft Switches (momentary)
  • Arduino Nano
  • No addional PCB required

Total costs for these are below 50 €.

Features:

  • Programmable: Less easy than e.g. a Morningstar MC6, so no web editor. Changes have to be done in the arduino code (via USB), but the structure of the code is really easy to understand.
  • Five modes/banks for various combinations of button functions. It can easily be changed by users to provide more banks, if required.
  • Everything is customizable, including the display text (and of course the midi messages)
  • Unlimited number of Midi Messages with each footpress (only limited by the default memory of the arduino, which should be more than sufficient)
  • Two functions per button: Single click and Longpress
  • Optional (series) of Midi Messages to be send when a new bank is selected, e.g. to activate a specific preset on the target device(s).