News:

Forum may be experiencing issues.

Main Menu
Menu

Show posts

This section allows you to view all posts made by this member. Note that you can only see posts made in areas you currently have access to.

Show posts Menu

Topics - Haberdasher

#1
Build Reports / BoB Preamp
August 24, 2020, 09:12:56 AM
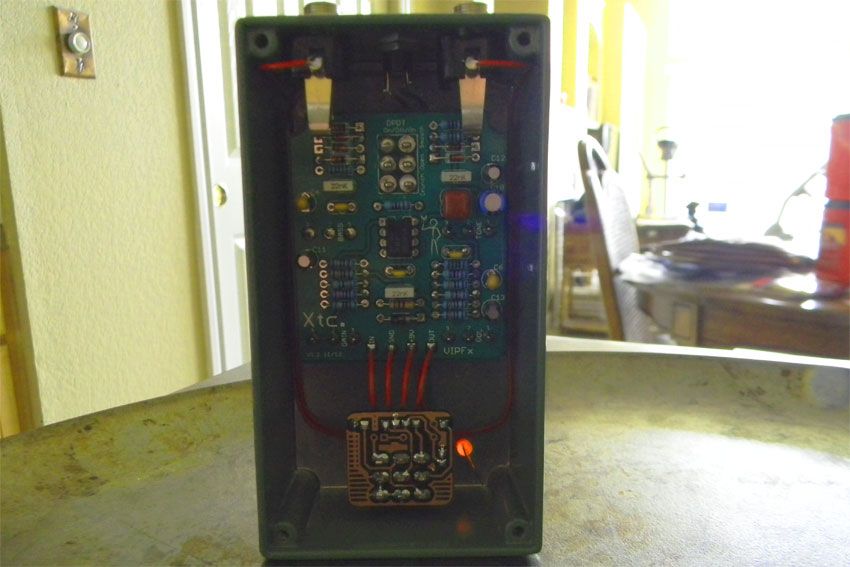
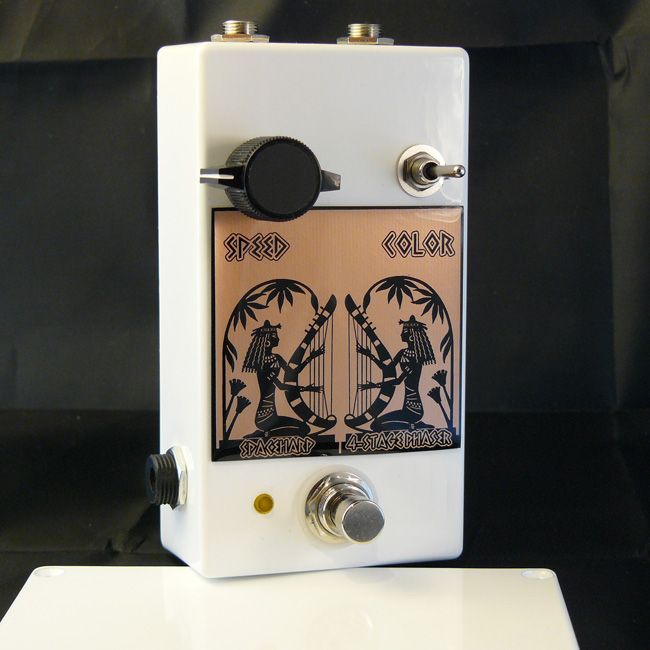
Here's a box I drilled as a newb, and it used to have a horribly wired sft in it.  I had this old madbean glitterrattii (BB pre) sitting around and decided to re-use the enclosure.  It's a nice sounding drive.
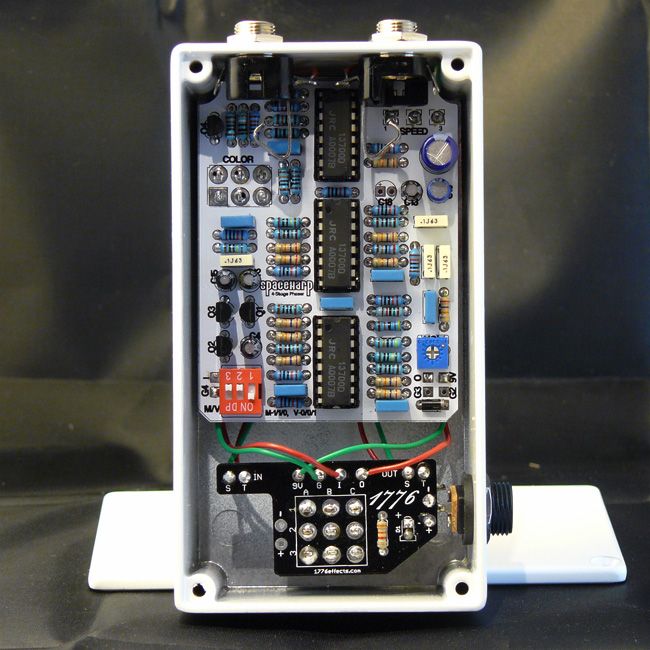
The LED hole was right where I wanted to put the BB, so the BoB pre was born.  I stuffed a coda soft bypass in where the battery was supposed to go.


#2
Build Reports / Built Some Stuff
August 02, 2020, 10:20:06 PM
This is John Lyon's Scarab fuzz, via storyboardist.  Shout out to both gents; it sounds great.  The fat control might possibly be backwards on the layout.  I'm not quite sure about that, but it really doesn't matter to me.  Also, I added a couple of pads for a 2n2 cap someone mentioned down in the comments for this project.
I'd already drilled the box by the time I decided to use the coda bypass, and seeing as how the coda probably isn't meant for 1590b anyway, it was time to break out the shoehorn.  The wiring nearly got out of hand, but it turned out ok in the end.  In fact, I think this pedal turned out to be a real looker.  I'm scared to get it dirty!


Next up is a Tusk pcb I've had for quite a long time.  Yeah, everyone knows a klon is supposed to have a Centaur on it, but I'm not Sagittarius. ;)
I tried to make up for the lack of unicorn magic in the graphics with some My Little Pony™ wiring in the interior.  And oh yeah, the unicorn tears are made of telefunken OA126, freshly squozen.
This pedal is pretty loud.  I'll probably use it to boost another drive.


There will probably be more to come later if I ever sort out some graphics.
#3
I'm seeking opinions about the best way and the preferred tool for you guys when you need to get rid of some material inside an enclosure.  I've never really had to do this before so I'm hoping to work smart without banging up the box.

Situation:  I bought 2 1690ns's (1590C clones) with nice powder coat from PPP a looonnng time ago, and now I'm realizing they aren't the best choice because there isn't quite as much room at the inside bottom (well, really the top I guess) as a 1590bb tall.  This is mostly due, I think, to the rather large interior screw channels.

So what is the most efficient method/best tool for the job?  Any opinions out there?
FWIW, I've got a rotary tool with some accessories, a drill, and some other stuff like files.  My neighbor offered me the use of his 4 1/2" angle grinder but I don't think he realizes how small these enclosures are, lol.  I could see where one of those oscillating tools with a skinny blade on it could be pretty useful, but I don't have one. :(
#4
Build Reports / Early Aquaboy w 3PRR
June 07, 2018, 08:23:43 AM
Hey guys, long time no build report!
Here's an old-school aquaboy I've had for ages.  Decided to go with 15v, so I threw in one of bean's 3PRR pcb's.  I'm not 100% sure it was necessary, but I made my own long pin pcb mount pots so I could stick the I/O jacks under the board to make room for the 3PRR.  So that was a little extra work, but worked out great in the end.
The graphics were done in photoshop, and etched n a black faceplate with clear coat enamel.  I used a diffused purple led which looks really nice I think.  I'm not too crazy about the cream knobs but there was no contrast with black ones.  So let me know what you think about that.
I hope you like it!


#5
Build Reports / 2014 Naughty Fish
April 24, 2016, 06:56:10 PM
Naughty Fish that I have been meaning to build for ages, so I finally decided to cast aside this pesky ADHD & concentrate long enough to finish it up.
Super tight squeeze with the thripidity switch pcb in there.  For a while I didn't think it was going to work out but it was a matter of turning the input jack to the right position.
It's an etched faceplate on top.  I basically copied from brejna's design of this pedal and threw something together in PS using some fonts and rounded rectangles.
I think I read something about the 2014 version, where the pass filters were backwards, so I reversed those on the plate.  I hope that's right, but who knows, lol.
I usually sand the weird chalky looking finish off the copper on this thin black stuff (the faceplate material), but this time I left it on to see what would happen.  Not too bad!  Still need to clearcoat or envirotex, but here's pix of it all dry-fit together.


thanks for looking
#6
Here's madbean's Danger Zone in 1590b with a lectric-fx 3pdt pcb (aka the Thripidity).
I finally broke down and tried my hand at etching an enclosure for the 1st time.  I found that it was a bit different than working with copper clad and I got what I consider to be a good bit of pitting.  I learned some things, so perhaps my next enclosure etch will show an improvement.  Whenever that may be...
Anyway, I've always told everyone else who tried these that one of the cool things about enclosure etches is that they even look cool when they are a bit grungy.  So here's my filthy grunge, please enjoy :)


#7
Build Reports / Zirconia Optical Compressor
March 18, 2015, 07:34:31 AM
Hello out there

This is my Zirconia Comp w tilt eq and external eq bypass switch.  Controls are volume, eq and compression.


It would have been a little easier to build this w side mounted i/o jacks but i'm on a mission to one day have a 125 board w all top mounts, inspired by JakeFuzz's board and someone else who posted a 125 board here a while back.  Very cool.

Cheers!
#8
Build Reports / xtc
February 13, 2015, 12:01:21 PM
wamp xtc

graphix?  we don't need no stinking grahpix.  well, maybe later.
horrible lighting on the gutshot, I know.
odb green from ppp, brown cupcake knobs, homemade stomp switch pcb
nice sounding od, and something a little different than a TS.  i like the open switch position the best, followed by crunch.


cheers
#9
Open Discussion / NRRGSMGD!
December 24, 2014, 03:11:09 PM
I sold off one of my old guitars i never play and a speaker cab recently.  Turned it into this!
New Reverend Reeves Gabrels Signature Model Guitar Day  :D
New to me, anyway. ;)


This really is a killer little axe and i do love the neck.  Not quite into baseball bat territory, but close.
This is the slightly older Gabrels model that uses a Reverend hummer in the bridge, dimarzio fast track ii neck.  The pups are a wee bit hot, but that's ok since none of my other guitars really have hot pups. I like the bass roll off knob, the only problem is my hand is constantly flying up there to twiddlie with it, it's like crack!  I need to learn a couple of sweet spots and leave that damn thing alone haha.

The  really sad thing is i started off wanting to buy a tele with single coils, and totally failed lol.    Maybe next year.
#10
Hey guys & gals.  Here's a new one from me: the Celeste Chorus.  It's a reproduction of the old analog Clone Theory with the vibe/flange switch.
I built this sideways like the original somewhat, but it could obvi be built vertical too, with right and left i/o jacks.  The faceplate is an etch.  By the time i thought about envirotex I had already drilled the holes in it, so i might just spray it with clear instead unless i figure out a way to manage enviro when holes are already present...

Enjoy.


sorry for the screen-rape with so many pix, i couldn't figure out which ones to keep. :P
#11
Build Reports / SpaceHarp Phaser
March 26, 2014, 08:42:51 AM
Hey everyone, it has been a long time since i made a report.  Too long!

To remedy that, I present my 125b ehx small stone design (early version 1) with input buffer and output boost, using 3x LM13700.  PCB mounted pot & switch, and the awesome kobiconn jacks (top mounted in this example) make for a very clean build.
Etched faceplate with famowood glaze coat (envirotex equiv).  It was my first time using it and it came out pretty great.  I kind of wish i had put it on a little thicker but it still looks very cool in person.


I do have these pcb's for sale for any & all interested in building it.  Here is the thread in the buy/sell trade room.


cheers!
#12
Open Discussion / black friday specials?
November 29, 2013, 11:20:58 AM
i thought it might be interesting/helpful to post any interesting BF specials here

if anyone has been thinking about building some cables or needing connectors, etc, redco.com has a special today, $10 off any order of >$50
code TURKEY10

anyone know of any other cool stuff?
#13
Build Reports / Chunk Chunk
February 09, 2013, 06:37:39 AM
Here's a chunk chunk I finished yesterday.  I used the biasing method outlined by cleggy. Plastic jacks on this build so I used a crimp on ring around the footswitch to ground.  I twisted the output and ground wires together and this thing is silent. Sounds great!  Metal licks sound legit using this, I love it.


Sorry for the out of focus shots.  I was too lazy to drag out the tripod.
Thanks for looking.
#14
General Questions / Drill bit size for stand off holes?
September 30, 2012, 03:09:07 PM
I've got a customer who needs holes drilled out for standoffs.  I have never used any of them, nor do I have any of them here to eyeball.  Oddly enough it's something that has never come up before for me.

Anybody got a drill bit size suggestion for me?

thanks a bunch in advance
#15
Build Reports / New Kingslayer build
September 16, 2012, 07:58:32 AM
True Byass Kingslayer built mostly to spec with one of my etched faceplates.  It uses the exact drilling template from madbean's build pdf (except for the LED placement).

I installed one of the 3pdt boards from raulduke (SJ effects) for the first time which was very nice to use.  It made everything very tidy!  Man, I could probably get used to that. 8)

I'm undecided on what chip to use in here.  Pictured is a tle2072 which cut down on the slight fizz I get with the tlc274, but the 274 seems to have a little more character.


It sounds great but something isn't right with my build. Everything else works, but the vol and tone knobs are not functioning.  The dual gang clean/dirt pot goes from clean to dirt but it's the only way I have to make it louder or quieter.  Got to do some troubleshooting with this, but wanted to go ahead and take photos before I tear into it. :)

cheers
#16
Build Reports / Engineer's Thumb Comp
July 24, 2012, 06:50:08 AM
I had wet sanded this box over a year ago and never used it so I thought I'd put this inside.  I won't be preparing an enclosure that way again unless I get a nice orbital sander.  Way too much work by hand.

I'm kind of at a loss for graphics.  I know The Engineer's Thumb is a Sherlock Holmes story but I don't think I ever read that one, haha.  I may just label the knobs and be done with it.  Or maybe just a simple thumbs-up graphic.  If I ever add anything I guess I'll update this thread.  I do need to go back in and install an indicator led.

Very nice sound from this comp, and DEAD quiet.  In sound I think it's similar maybe to a ross but I may like this better, it's very clean and silent.  I was using it in front of the boneyard on a lower gain setting last night and it was sort of jaw dropping how silent it was after releasing a chord.  Crickets!

Not very exciting to look at, but here she is.


#17
Build Reports / Boneyard
July 16, 2012, 07:38:25 AM
4 knob stock boneyard except for the r5 c5 mod.  I used the a little bit of shielded wire, used the value of pots in the build doc and flipped r4 to the back.  unfortunately there is some persistent ringing in the last 1/4 turn of the high gain pot that I'll have to deal with at some point.  but right now it's too much fun to play to rip it apart.  it really does make my rig sound like a marshall, amazing!

Thanks to k.rock! for the awesome graphics for the faceplate.


In retrospect I think the silver marshall knobs would look much better so I'll have to order some.
I think I used more wire for this pedal than I have for any other project.  I got a little slippy toward the end I think because I was just ready to hear it, haha.
#18
Build Reports / Collosalus, or 'Paisley Flanger'
June 09, 2012, 12:48:42 PM
This one fired right up and it was pretty easy to get sounding good.  I may not be through playing with the trimmers quite yet, I dunno.

What a nice sounding box!  You can get flange, chorus, vibe and some phasey sounds out of this thing and it sounds really good at 15v.  I think I'm going to look into putting a charge pump in my old pork barrel and regging it for 15v now.


Another awesome madbean project.  Build it, you won't be sorry!
#19
Just a quick question about C1 in the wee lt1054 board available in the qvibe document (not the road rage).  I'd really like to use a low profile electrolytic for space saving reasons but all the 100uF caps I have that are over 16v are of the larger variety.

Which of these 3 options would be the most preferable

a) 16v 100uF cap.  It looks like the cap may be before the 18v happens?  is that ok?
b) 25v 47uF cap.  OK to sub 47u?
c) use the big 100uF cap and just deal with it.

thanks
#20
Build Reports / Hurtin for an Urchin
May 07, 2012, 12:42:11 PM
Sea Urchin, finally built one for myself.  Nice organic, gurgly delay.  I like.

Not much to tell.  Raw aluminum hammond box, board mount pots, toner transfer with blue laser foil fused to it.  It didn't really photograph too well but it looks nice and shiny in person and the text is quite easy to read due to the contrast.

I suppose I tried to mimic mad prof style, which is pretty minimal.  Hope you enjoy.