News:

Forum may be experiencing issues.

Main Menu
Menu

Show posts

This section allows you to view all posts made by this member. Note that you can only see posts made in areas you currently have access to.

Show posts Menu

Topics - storyboardist

#1
Build Reports / Bruin Overdrive
October 02, 2023, 08:56:18 AM
I've had the boards made, enclosure printed (and even drilled!) for months and finally got this put together over the weekend.


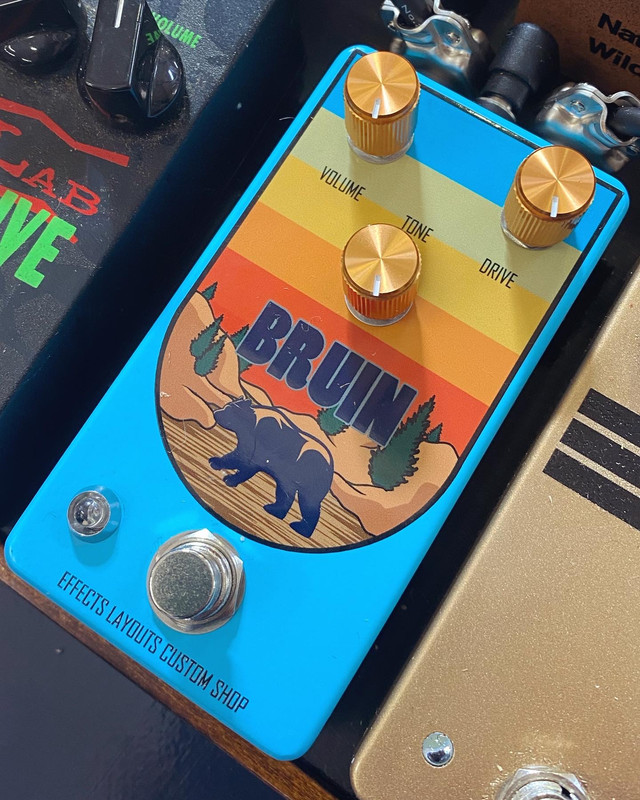
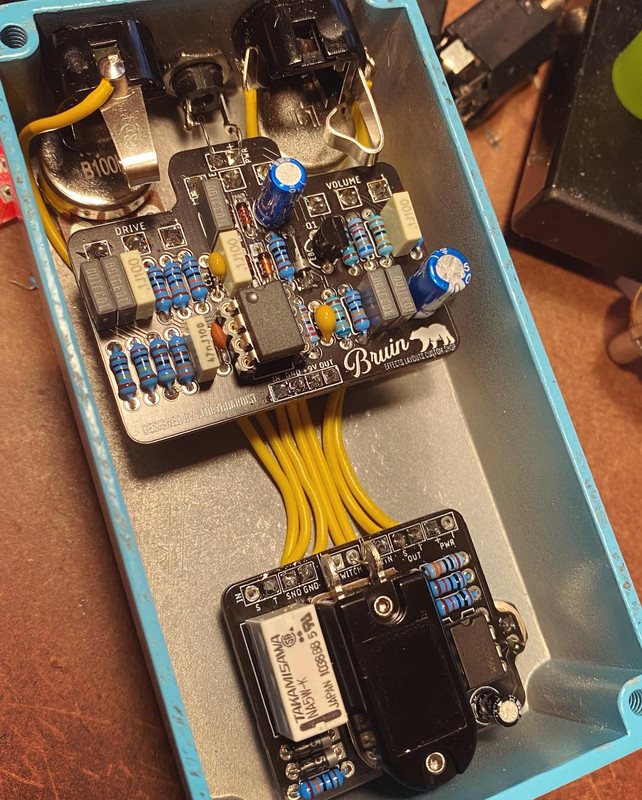
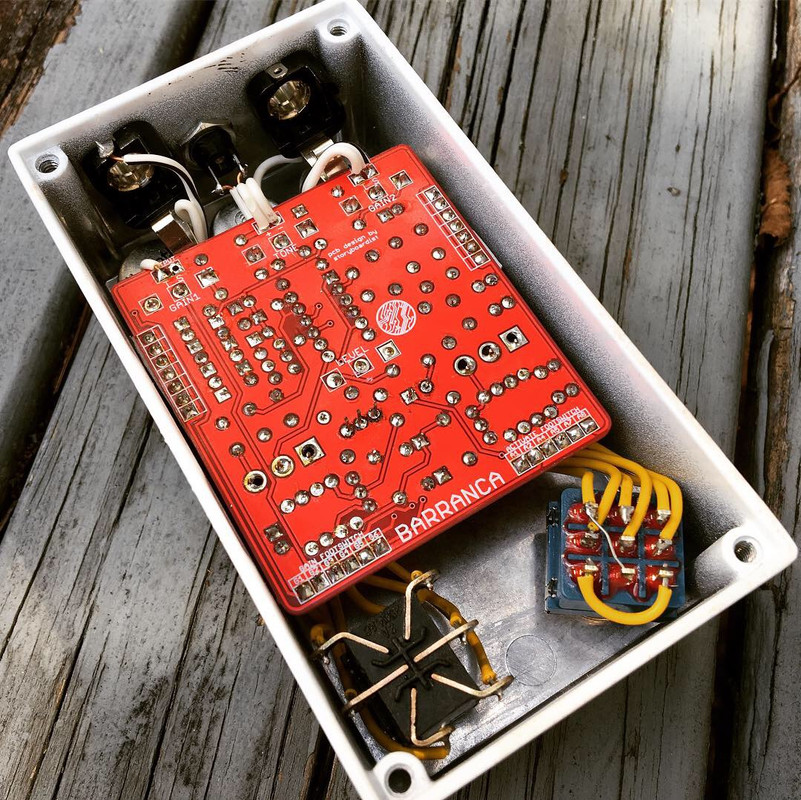
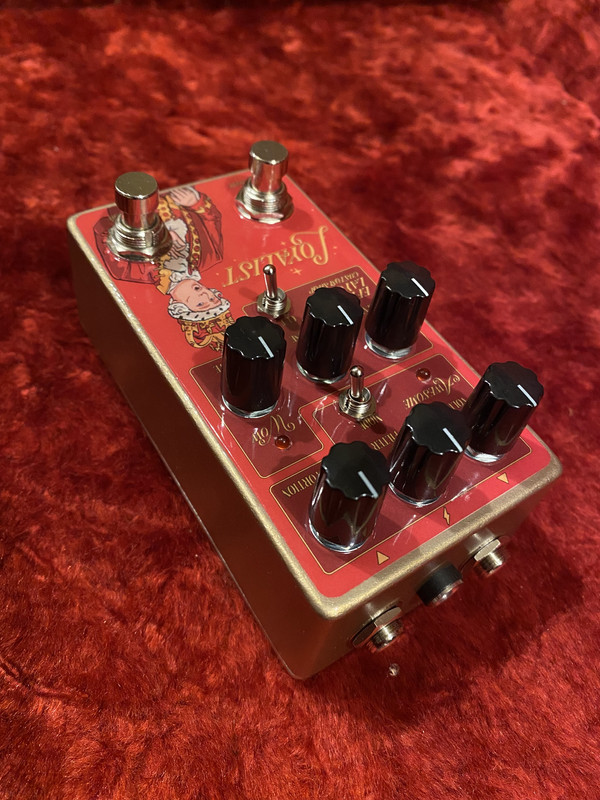
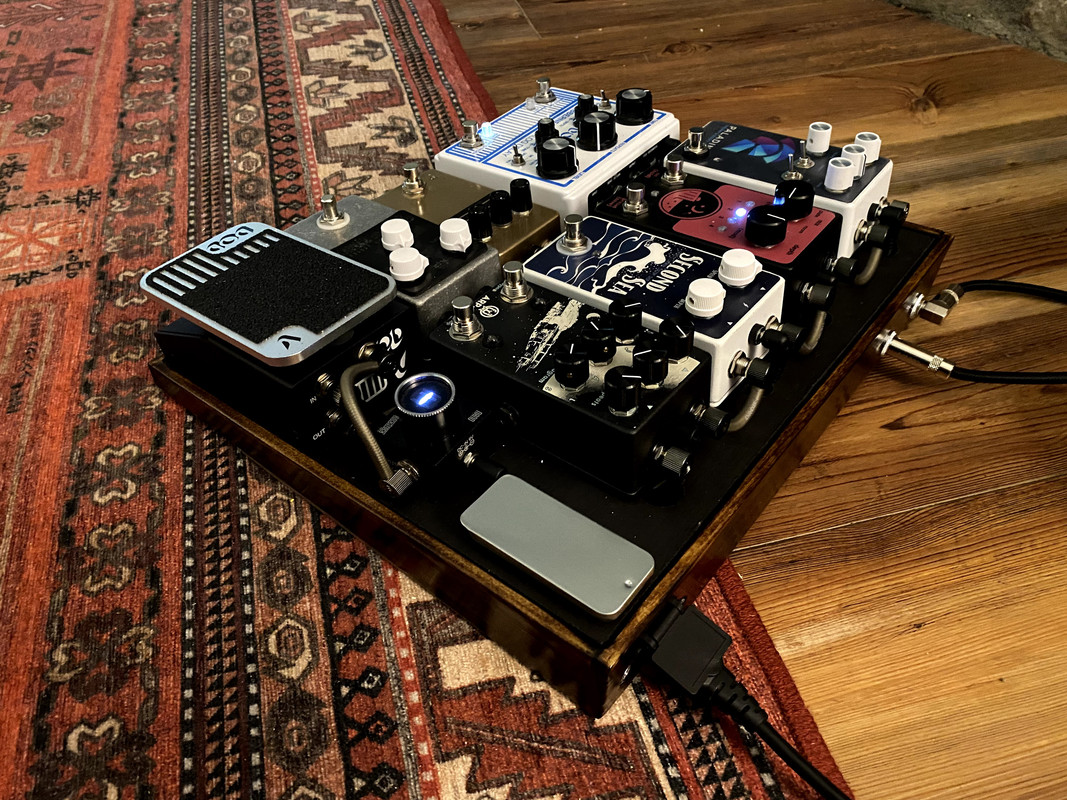
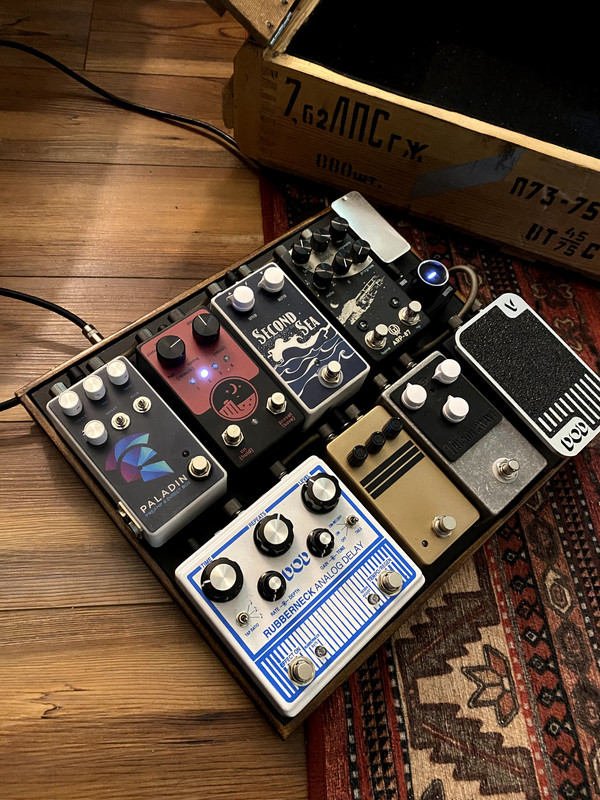
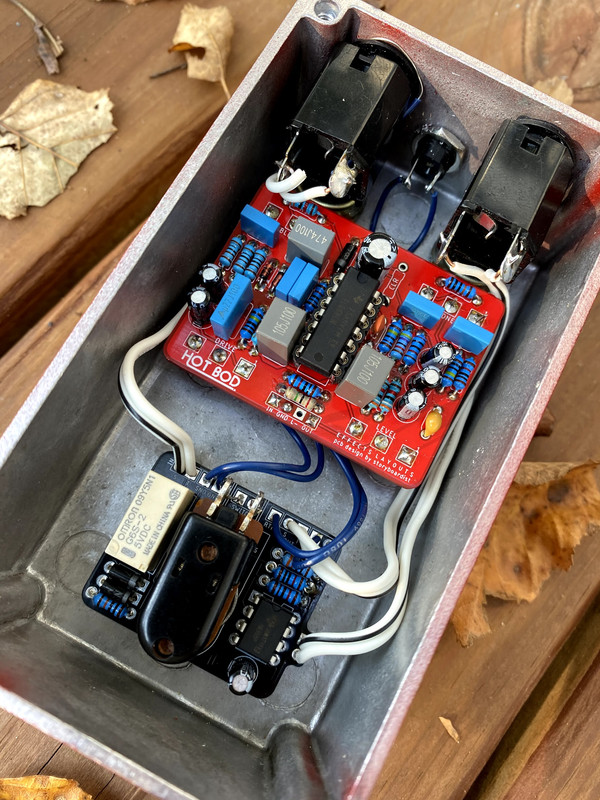
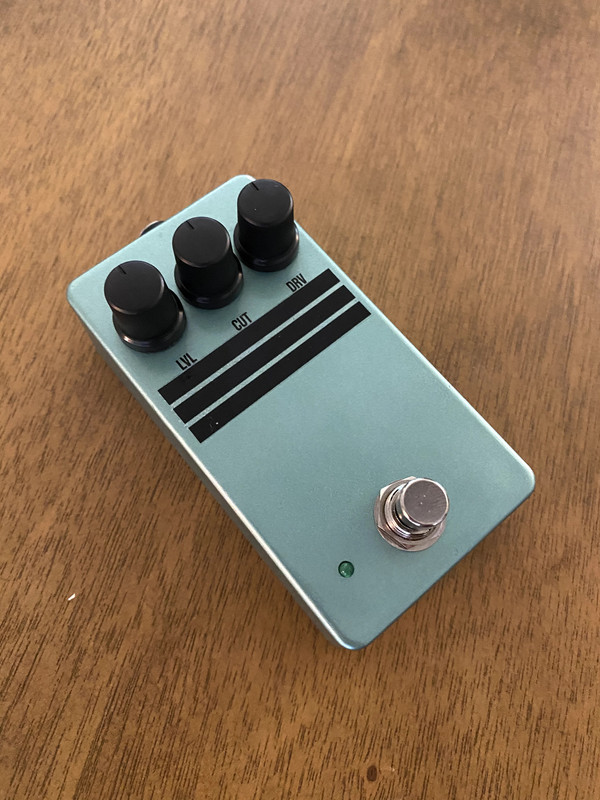
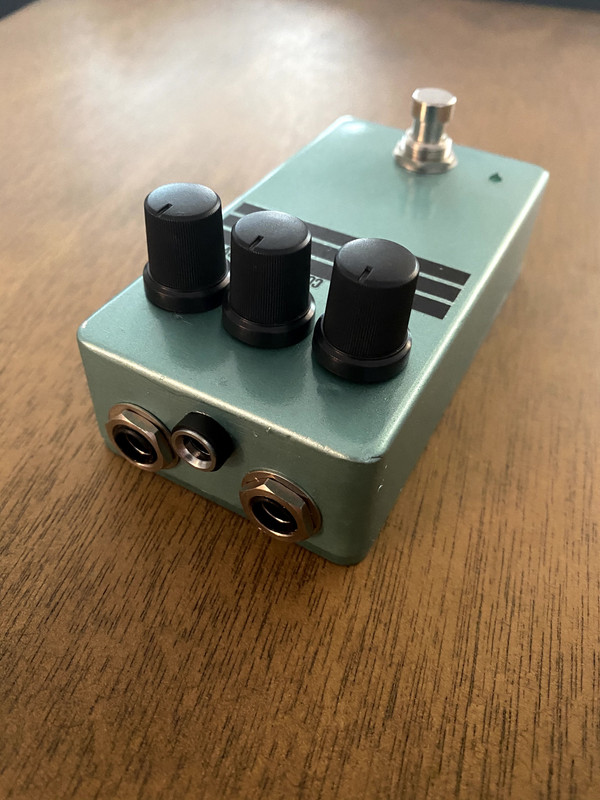
It's a modified Bluesbreaker circuit with an EQD Arrows booster at the output. I've played around with the circuit before, but as part of a 2-in-1 project and wanted a stand-alone version for my personal pedal board. Relay bypass is the Incandenza circuit. 1590B enclosure was UV printed by Tayda (the grey around "Bruin" should have been white but that's Tayda I guess). The "Bruin" name comes from one of my sons. His name is Ewan (Yoo-un) and we've always called him bear or Ewie-bear since he was little, so Bruin's a nod to that. Velcro'd it down on my pedal board almost immediately and played an entire set yesterday with it always on. Might need to make a board for the masses.  ;)

#2
Build Reports / Couple builds - Super Trouper and Lilliput
September 26, 2022, 09:42:00 AM
First up, I finally boxed up my Super Trouper prototype that's been sitting in a box for 4 years. You can emulate either the Sunn Model T or Laney Super Troupe with a couple value changes. A friend had screen printed an enclosure for me (which had also been sitting in a box for a couple years) in a Sunn motif. Replaced the toggle switch with a footswitch to select between the 2 different channels. Came out mostly clean inside despite the extra offboard wiring.


Next up is the Lilliput. Much less time sitting in a box comparatively. The Lilliput is a clone of the SS/BS Mini. Used an old b-stock 125B in purple sparkle from PPP (that had sat in a box for ages to keep on theme here) and mod podged the triangle design on. Added soft touch relay bypass with an Incandenza board and then immediately velcro'd it to my pedal board.


#3
Build Reports / Schematic Fuzz
August 16, 2022, 06:55:49 AM
A little while ago had the idea to do a simple circuit with the schematic on the silkscreen with the components paced on the corresponding symbol. Initially I just thought it would look cool, but I think it's a good tool for translating between schematic and pcb for beginners. It's just a Fuzz Face, but it worked well for the task. Some inspiration struck for graphics, so I boxed it up last night. MP38 germaniums and I fit it in a 1590B with top mounted jacks.


#4
General Questions / Series switch confusion
May 12, 2022, 10:47:53 AM
So I've been trying to figure out the switching scheme that was used on the original Way Huge Camel Toe. The CT is a 2-in-1 (Red Llama + Green Rhino), but the bypass switching is a little squirrelly. One footswitch turns it on with the other selecting between the two circuits, similar to the EQD Grey Channel. However, there's a toggle switch labeled "series" that makes it so the first footswitch turns on the Rhino side, with the second footswitch turning on/off the Llama side (Rhino into Llama). The new version does this switching electronically, but the original from the late 90s did it with 2, 3PDTs, a DPDT toggle, and a DPDT relay. Here's some gut shots:


Here's the schematic I worked up, but I haven't been able to get it to work. Was hoping a second+ pair of eyes over it might help. All the switches makes my head hurt after about 3 minutes. lol


If anyone has any input or is just a wizard at switching, any input would be appreciated.

#5
Finished this up Saturday and just wrapped up the demo for it. Dug out my original prototype etched board from 2015 for the Drivestortion project. Top mounted jacks in a 1590B, which is satisfying to do, but definitely requires some low profile patch cables in practice. Name/graphics inspiration comes from Ukraine often being called the breadbasket of Europe, as they're one of the largest grain exporters in the world.


#6
Build Reports / PFUKR - Kозак (Cossack)
April 08, 2022, 08:34:13 AM
Here's my first contribution to the Pedals for Ukraine fundraising effort. Really pleased with how this turned out. UV printed enclosure from Tayda and a new board that will soon be available on my store. It's a pretty standard Klone with Soviet D9E diodes (which I bought from a Ukrainian eBay seller a while back) and added Incandenza relay bypass.


(Now for a very condensed thumbnail of some history that is likely oversimplified.)

I picked Kозак as the name at the prompting of my friend Paul as the Cossacks have a long history of fighting for the freedom of Ukraine. They were highly regarded as soldiers and fighters and often were oppressed by Imperial Russia (among other neighbors) and later the USSR for fear of them seeking their own independence. They have been an image of national-identity for Ukraine's independence and freedom since the fall of the Soviet Union in 1991. The horseman imagery is based on the Bohdan Khmelnytsky Monument, depicting the first Hetman of the Zaporizhian Host (a Ukrainian Cossack state in the 17-18th centuries later wiped out by Catherine the Great) in Sophia Square in Kyiv.

Really enjoyed the history dive as much as designing the artwork and building the pedal!
#7
Build Reports / Loyalist: Rat + Morning Glory
October 16, 2021, 12:58:39 PM
So a while back I was researching the JHS Morning Glory (don't remember why honestly), and stumbled across a blog post Josh Scott had written about various iterations of the MG. At one point there were plans to make the JHS Patriot, which was a Morning Glory + a Rat. JHS never actually put that one out, but I thought it was a great combo, so I whipped up a board for a 125B. In brainstorming the name I went in the opposite direction from Patriot and called it the Loyalist. Fast forward a couple weeks and my wife and I got to go see the touring show of Hamilton, which provided the inspiration for the artwork. Graphics printed on medium weight paper then Mod Podged onto the enclosure (about 4 coats). Flat sanded to remove brush strokes and then clear coated. Not sold on the knobs yet but they're what I had on hand. Might switch out later.


#8
For years now, I've primarily been a bass player, as far as actually playing out goes (mostly at church). But that's changing up and I'll be playing lead guitar primarily going forward. Been wanting to build a new, small pedal board for a while, so perfect time to get on it. The main parameter was it had to all fit in this old Soviet ammo crate:


It makes for a footprint of about 14" x 12," which is a good size for a small rig, but the kicker is the height. It's just under 5", so mounting anything under the board was gonna be tight. I put the hinges and latch on the box and lined the inside with some cheap felt.

I don't have any pics for the actual woodworking part of this sadly, but the frame is made out of some clear 1" poplar. I used rabbet joints and gave it a nice slope (can't remember the angle I cut). I decided I was going to try running an MXR Mini Iso-Brick under the board, as it's basically a 1590A size. Then decided if I was going to put that under there, I could run in/out jacks on the side. Power too. Here's the finished board:


The top is just 3/8" MDF painted matte black. The poplar sides I finished by shou sugi ban (which you essentially just burn the heck out of it with a propane torch, then use a wire brush to scrape off the charred wood. It burns the growth wood and the grain stands out more) and a couple coats of poly.

Time for power. Ended up recessing a small area on the bottom of the MDF to give the power supply a bit more room. Ended up having to use a different 18v power supply for the Iso-Brick, as the one that came with it was a massive wall wart and wasn't gonna work. Grabbed a small brick off Amazon and cut the cord and wired it directly to the power jack on the back side of the pedal board. Wired up the in/out jacks and made a few custom patch cables too.


Wanted a volume pedal but didn't want one to take up 1/3rd of the board. I picked up DOD mini volume pedal when the Harman was discontinuing DOD and blowing out stock. Wanted a tuner out jack, so I tacked one off the input jack. Lots of gears to clear, but it turned out ok.


Wanted a preamp at the end of my chain that could both go the the amp and PA, so I whipped up this pre/DI box based on the Roland JC-120 clean channel and combine it with an active DI.


Yes, I know, I need longer screws for the XLR jack.  ::) 
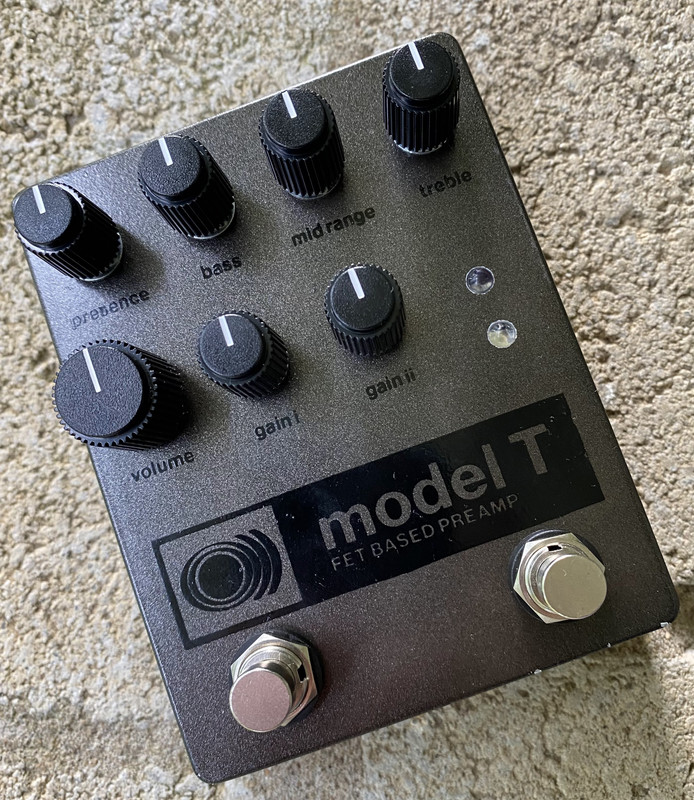
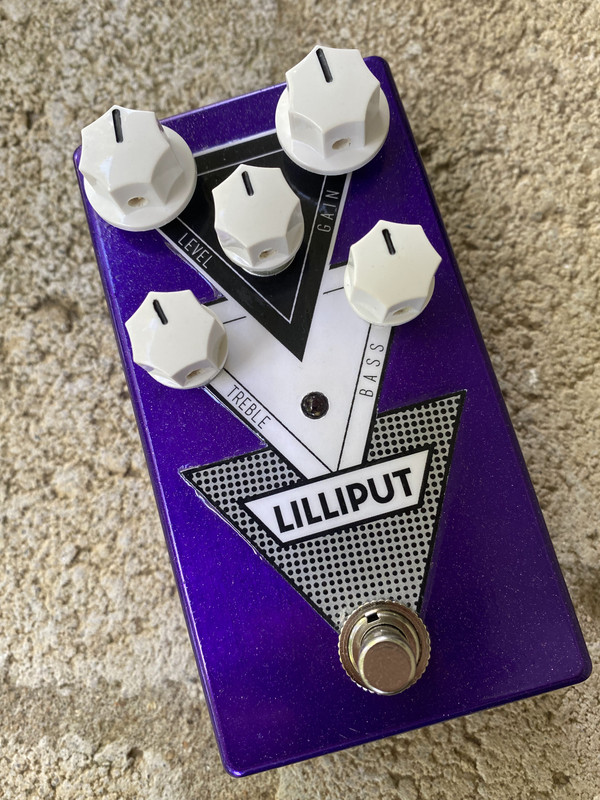
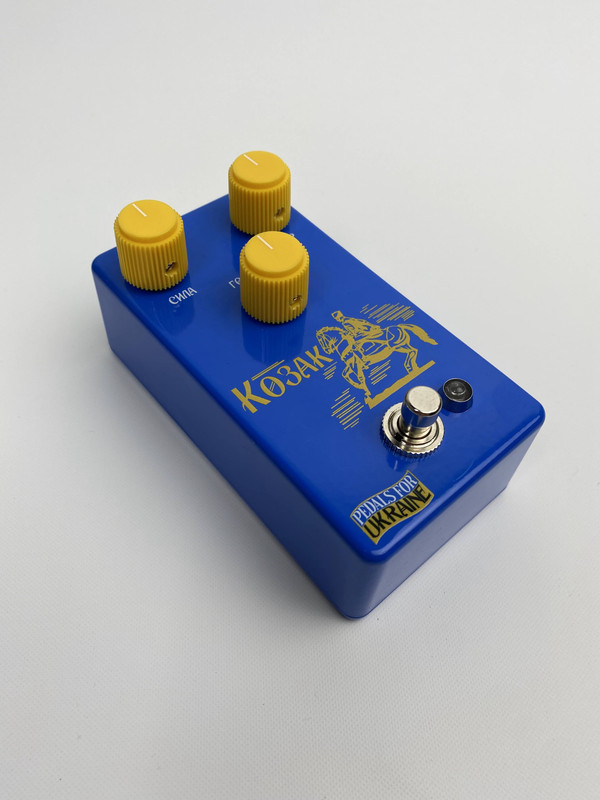
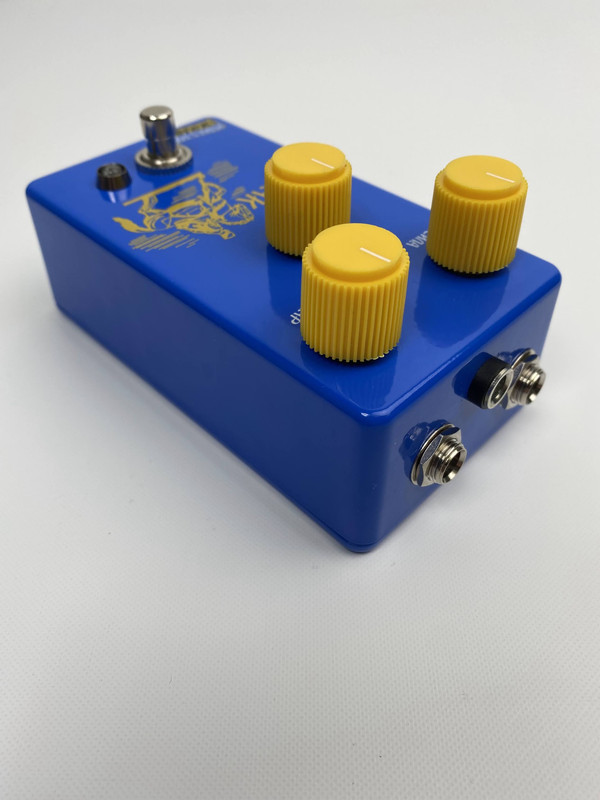
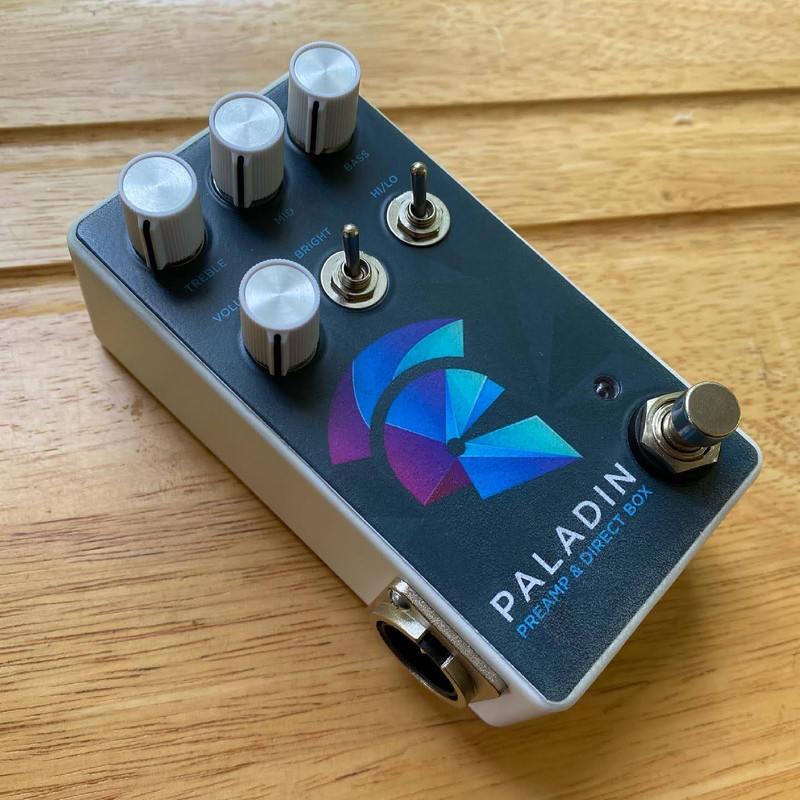
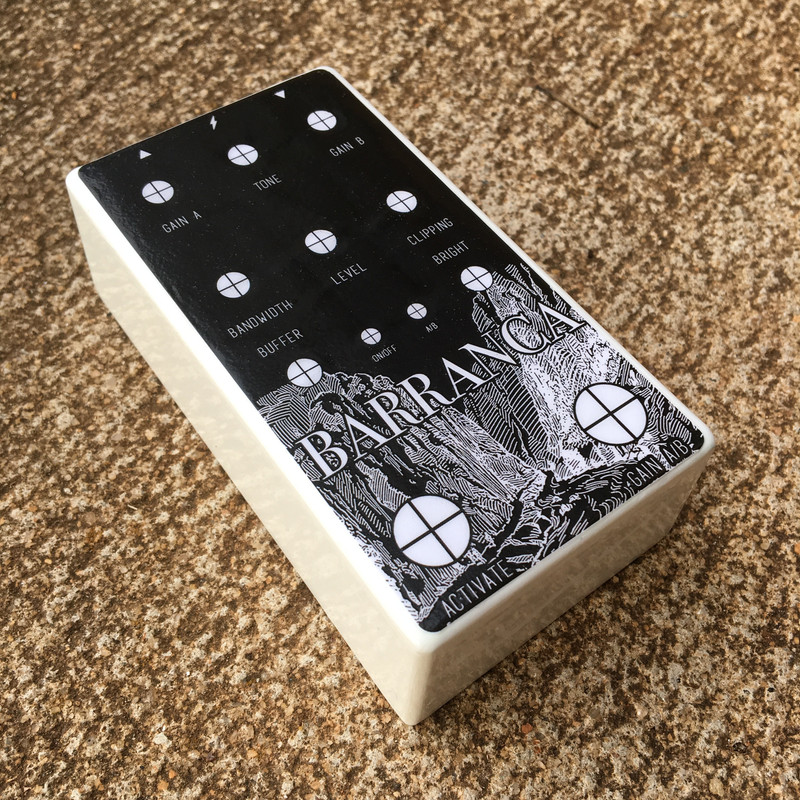
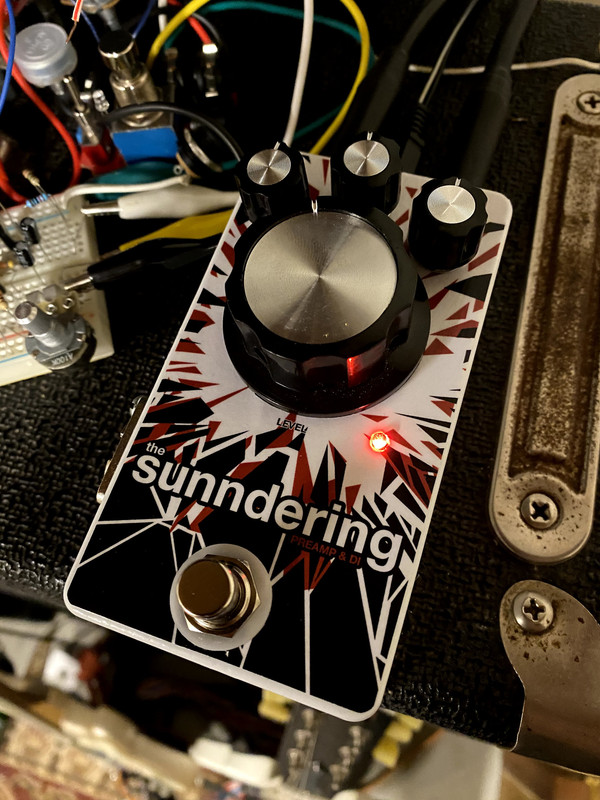
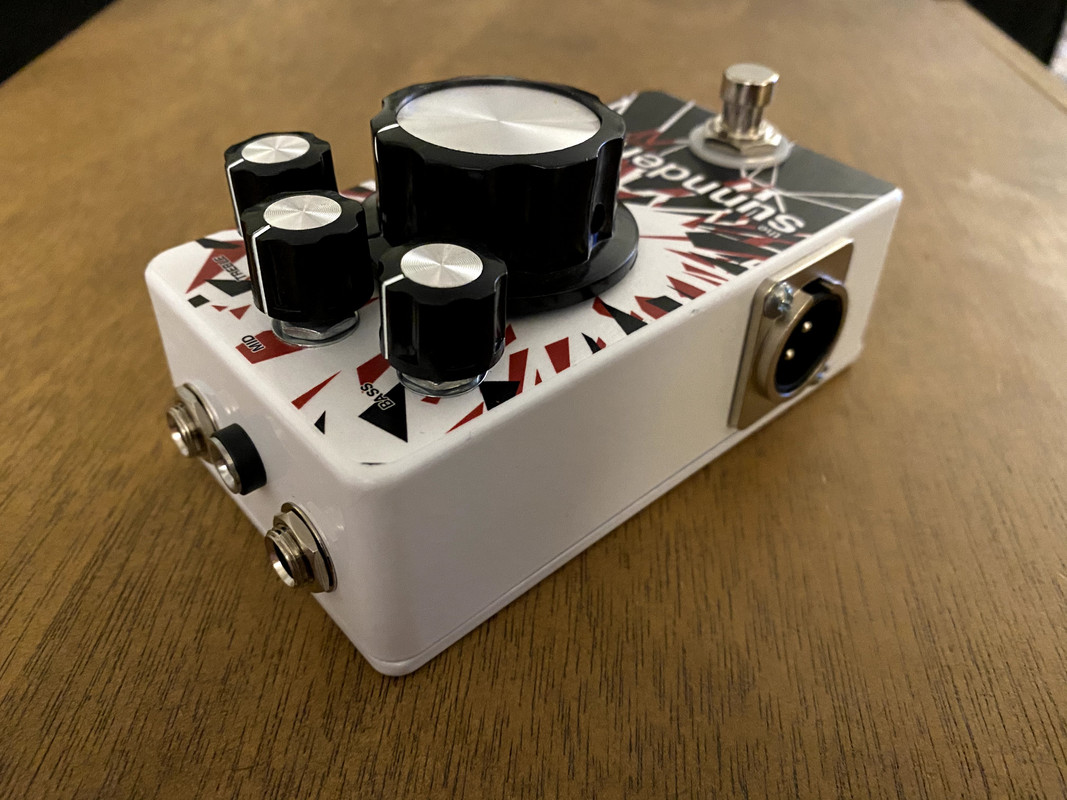
Box is just a white powdercoated 125B from Tayda with graphics printed out on medium weight paper and Mod Podged to the enclosure with about 3-4 layers. Then hit it with about 5-6 coats of matte clear and then flat sanded to remove brush strokes from the Mod Podge. One more coat of clear and it was super smooth. It was kinda humid the day I shot all the clear, so I think that's why there's some weird speckling by the footswitch. Oh well, lesson (probably not) learned.
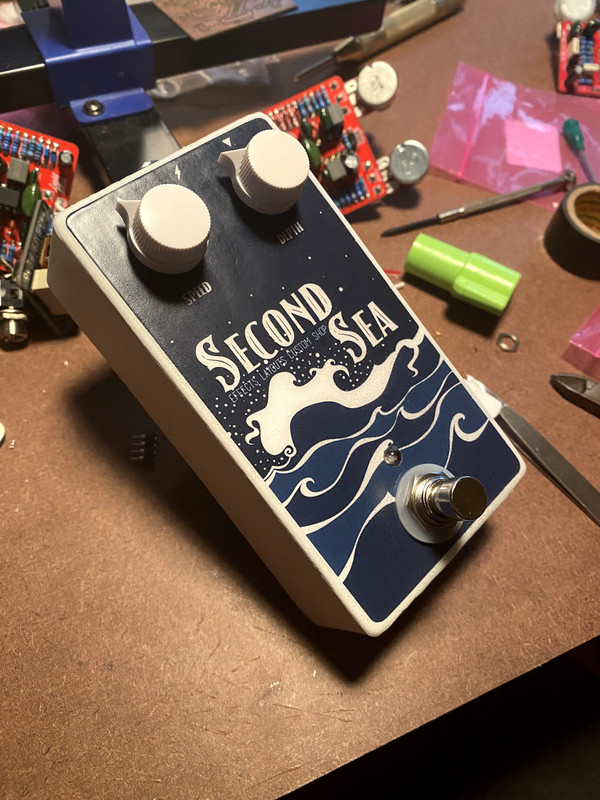
Next up, I decided I needed a chorus after I'd built a CE-2 clone for a friend. Got lucky off Ebay getting the MN3207 and MN3102 (seller: activeparts if you're needing some). They were a little pricier than what the Coolaudio ones used to go for, but beggars can't be choosers I suppose. They appear to be NOS Panasonics? IDK Finished the enclosure similarly to the Paladin, but got lucky and didn't have overly noticeable brush strokes, so I skipped the sanding step.


With that all done, time to put everything together. That was a bit of a struggle as I had to wrestle with the solderless patch cables I'd gotten (never doing solderless again), and needed to adjust the throw of the treadle on the volume pedal. Just speed bumps really. All came together before I actually needed to use it last Sunday and I'm really happy with it.


Signal chain goes in to the DOD Volume (split to the Rockstock Nano Tuner) > Thunderwave drive (modified Greer Lightspeed circuit) > DRV clone > DOD Rubberneck analog delay > Walrus Audio ARP-87 digital multi-function delay > Second Sea chorus (CE-2 clone) > Native Audio Ghost Ridge reverb (which is fan-freaking-tastic btw) > Paladin Pre/DI > amp/PA
#9
Build Reports / A Couple Bass Pedals
October 15, 2020, 09:32:50 AM
Been trying to box up some of my prototype builds lately. First up is my Sunndering bass preamp and DI. It's based on the Sunn S200 preamp, but with JFETs. 3-band EQ + volume control into a simple opamp-based DI. Graphics I just printed on medium weight paper and mod podged onto the enclosure.


(Drilling for the XLR was a PITA since my step bits stop at 3/4" and the hole needed is like .8"  >:( )

Next up is the Hot BOD bass drive, a modified DOD FX91. Used the Demedash Incandenza bypass scheme (555 flipflop to trigger a relay). Faceplate I printed on my resin 3D printer. Built it for a bass player friend who's in a band called "Midwell" so it's appropriately (appunpriately?) named. lol


#10
Build Reports / DRV Clone
September 10, 2020, 12:33:19 PM
Here's my take on the 1981 Inventions DRV. The board is the same as the layout on my blog but was my guinea pig for carving PCBs on a small tabletop CNC mill. Enclosure is jank 1590B knockoff with waterslide decals. Wired for buffered bypass like the original. I know there's differing opinions on this circuit, but I jammed with it for a good bit after boxing it up. To me it really shines with the gain turned down and volume up. Like a gnarlier Klon, it boosts your signal and adds a nice bit of snarl that responded well to pick attack. It also sounds good with or without the charge pump. Without it loses some headroom, but is still a great sounding dirt box at 9v. And with 18v it just give give you more headroom and a little more spankiness? YMMV, but I dig it.


#11
Build Reports / Midwell - Custom wooden enclosure content
February 07, 2020, 07:08:16 AM
A couple weeks ago I went to a house show/EP release party of a local band my brother-in-law works with (he does marketing/web stuff for them). Got to talking gear with the guitarist afterwards and we hit it off. Decided last weekend I wanted to make him a pedal. I ended up going way over board with this, but I'm pretty happy with how it turned out and he was super excited about it. Having quite the dad sense of humor and loving puns, I decided to build a mids EQ (Catalinbread VarioBoost clone) as the band name is Midwell.  ;D 
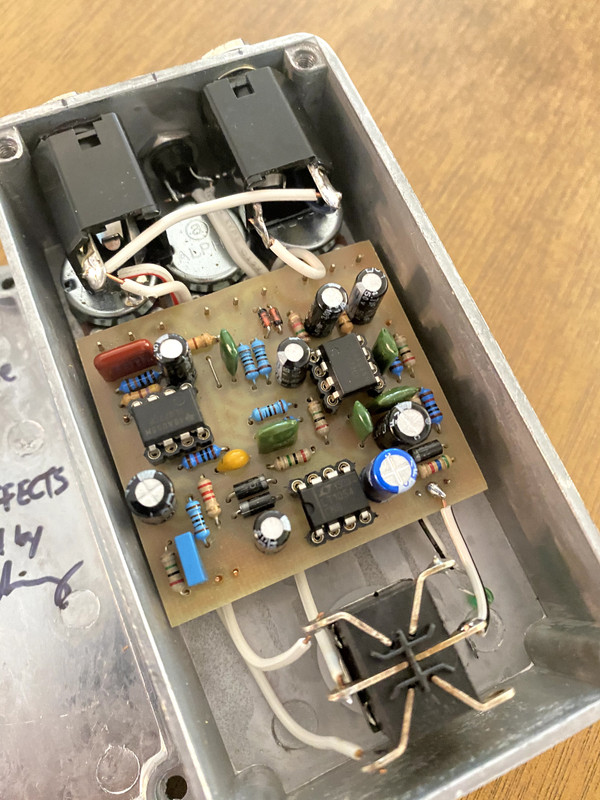
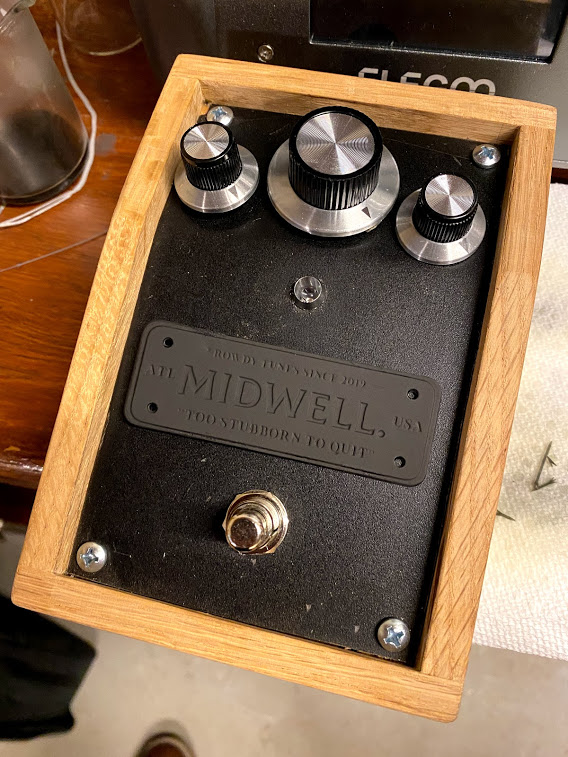
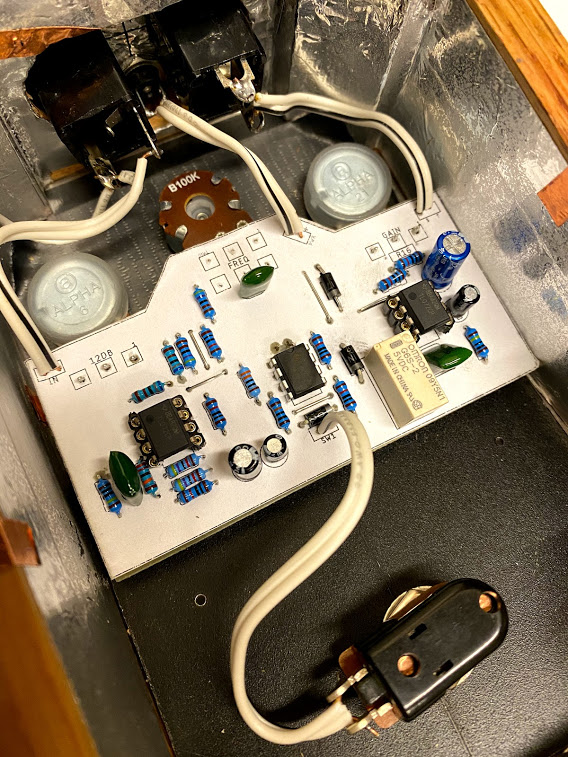
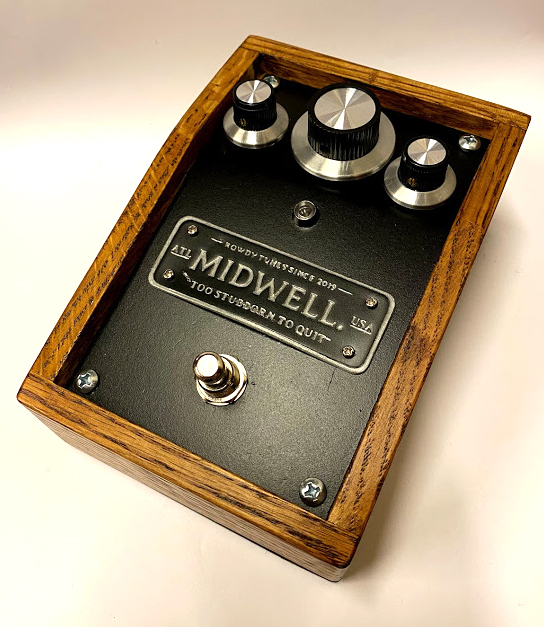
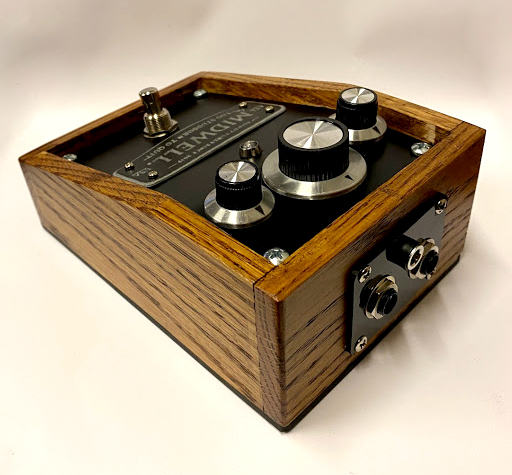
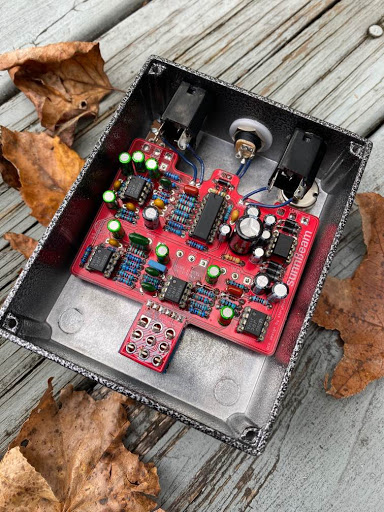
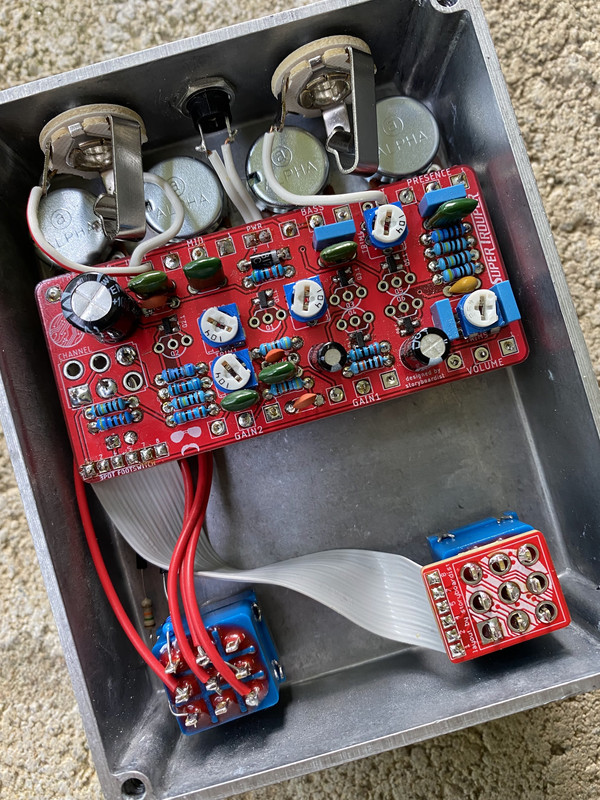
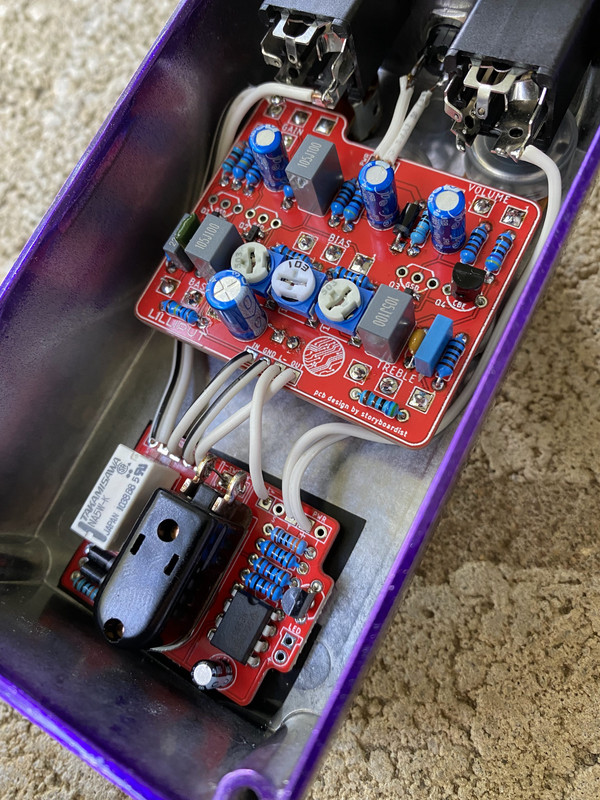
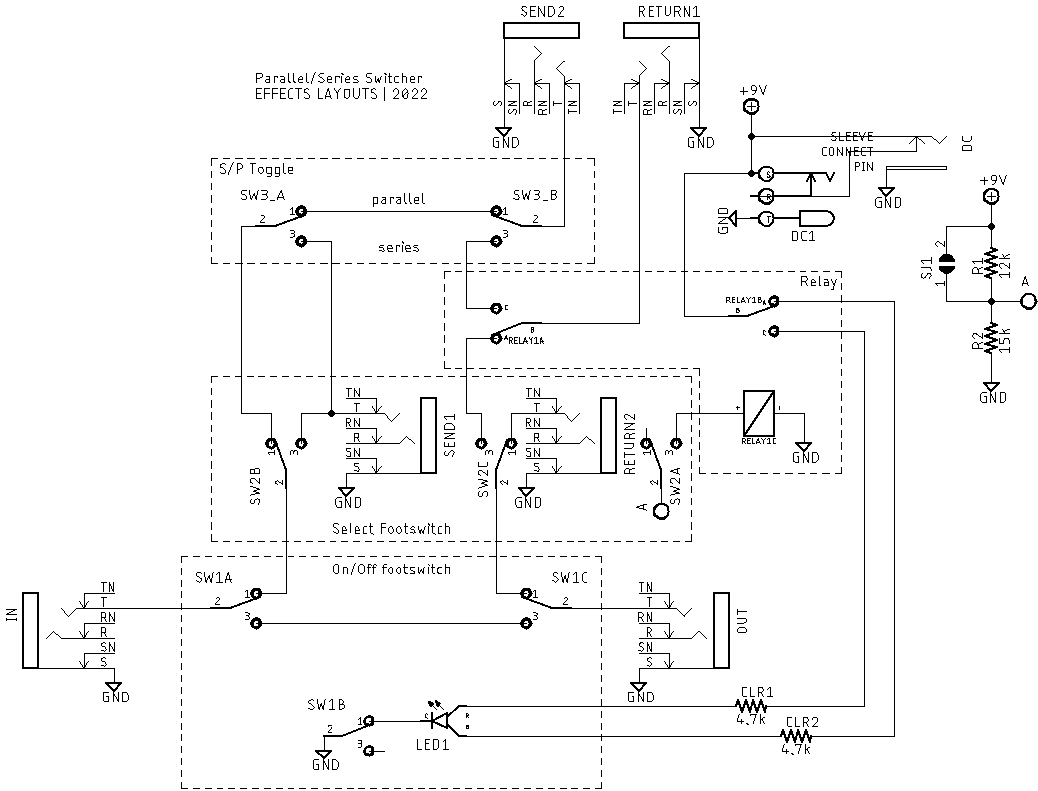
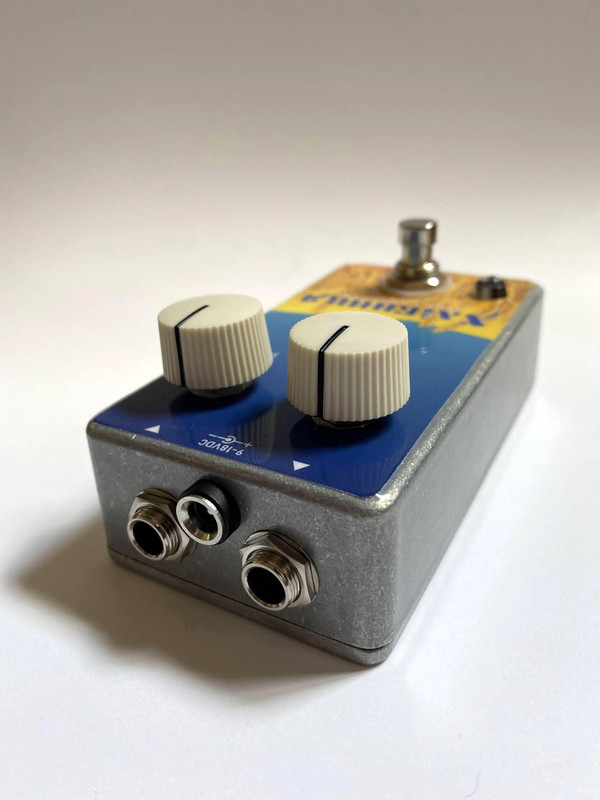
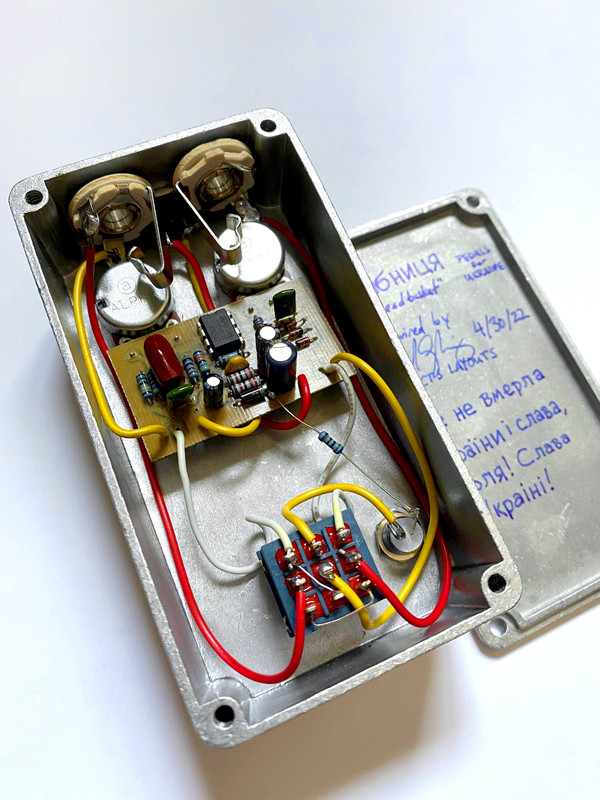
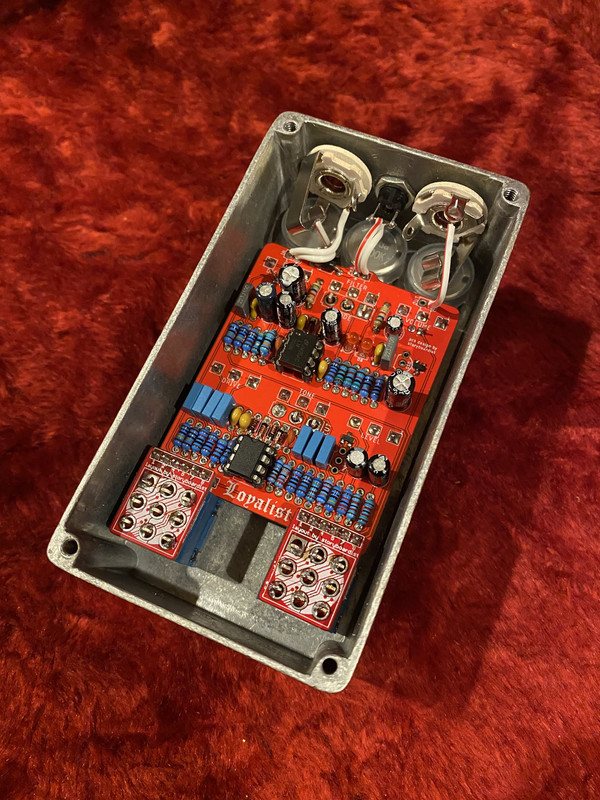
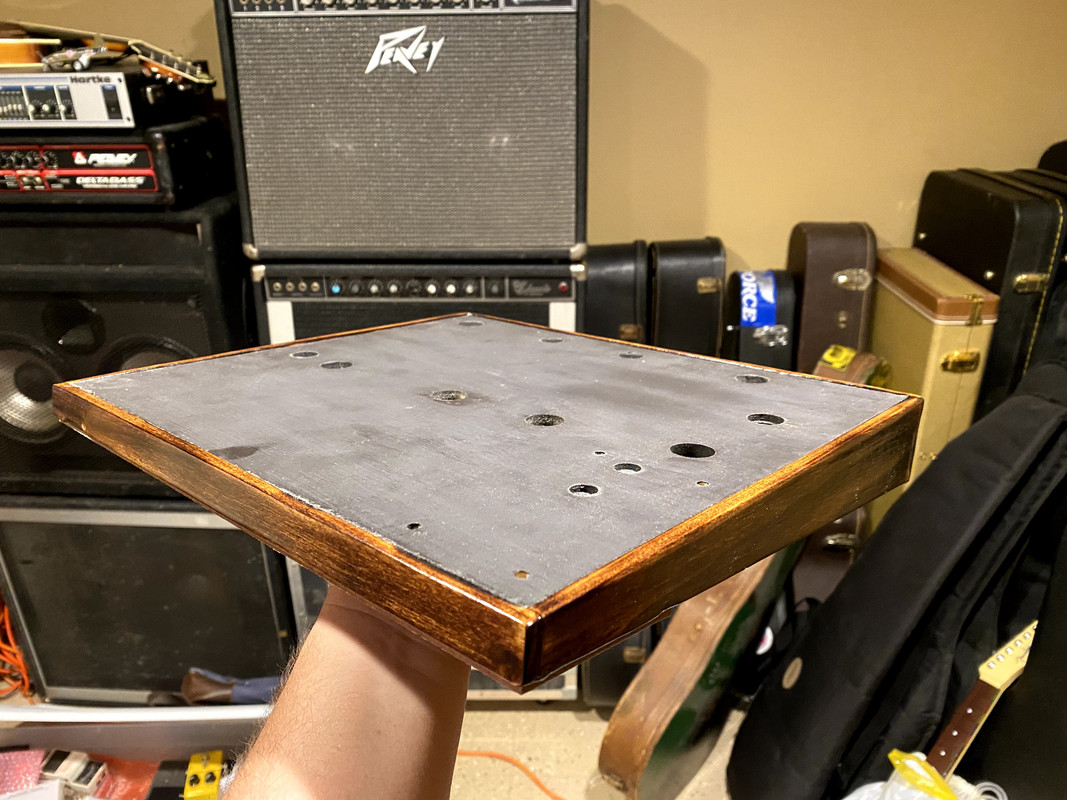
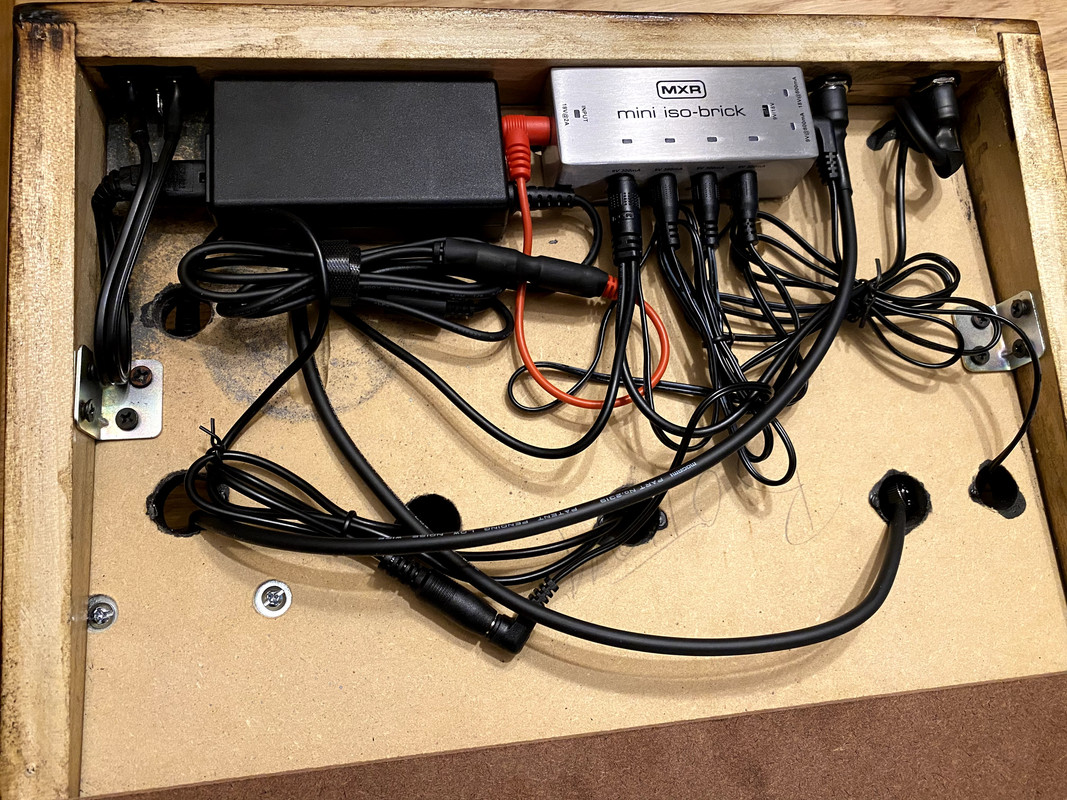
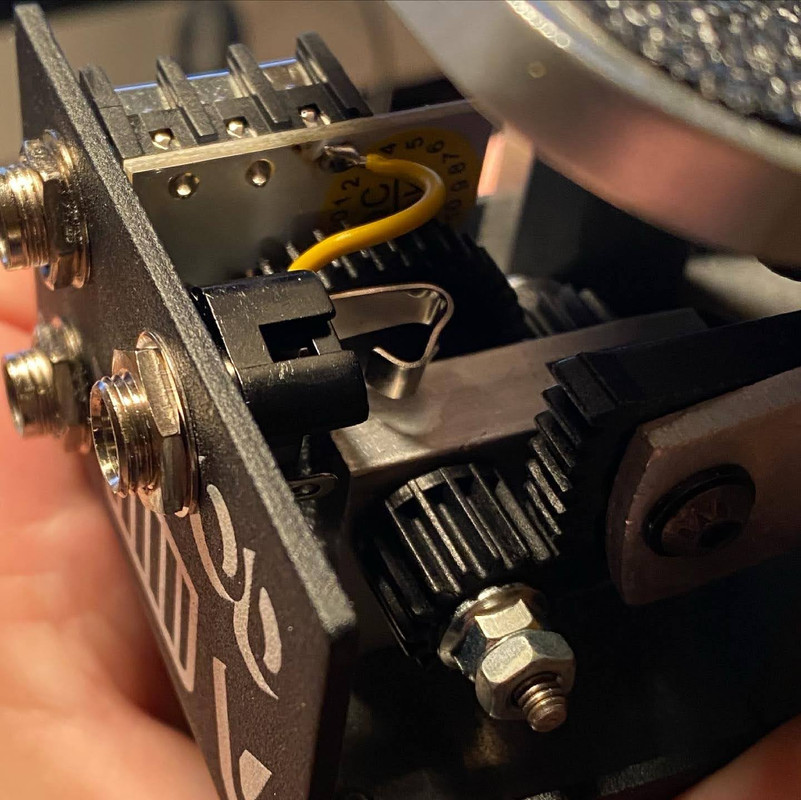
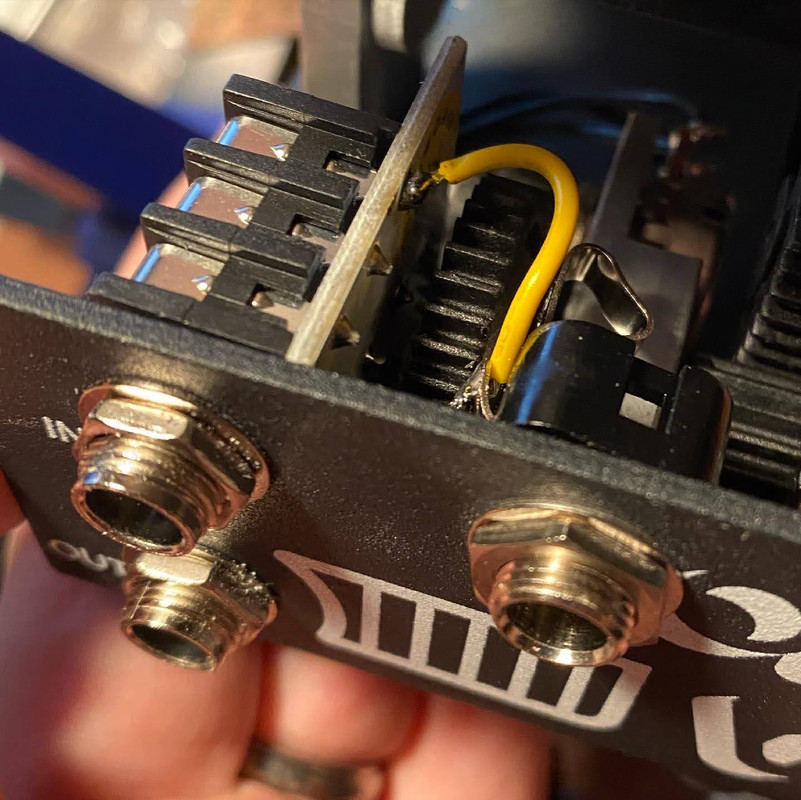
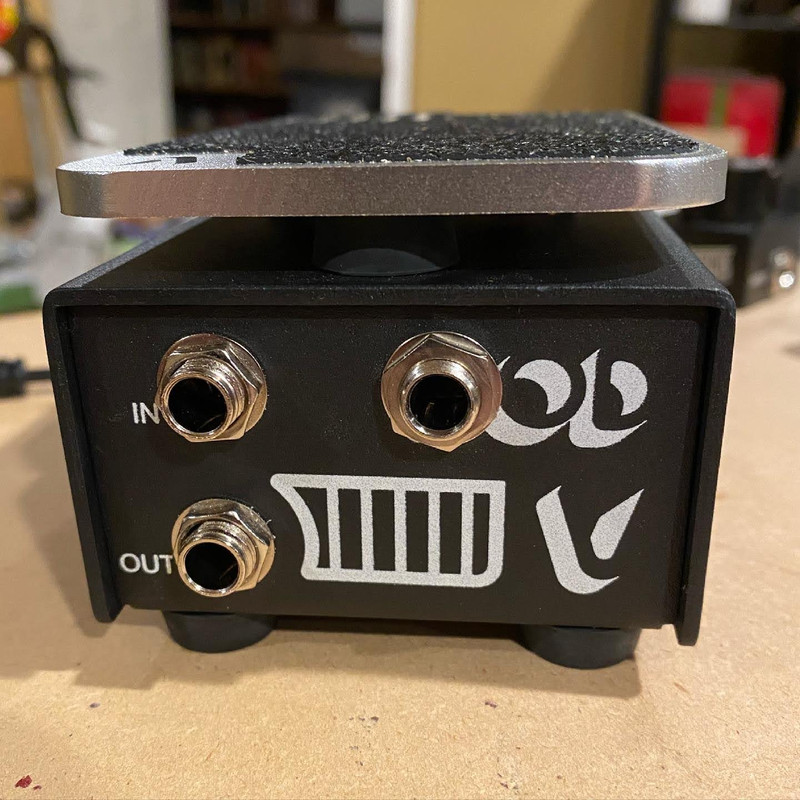
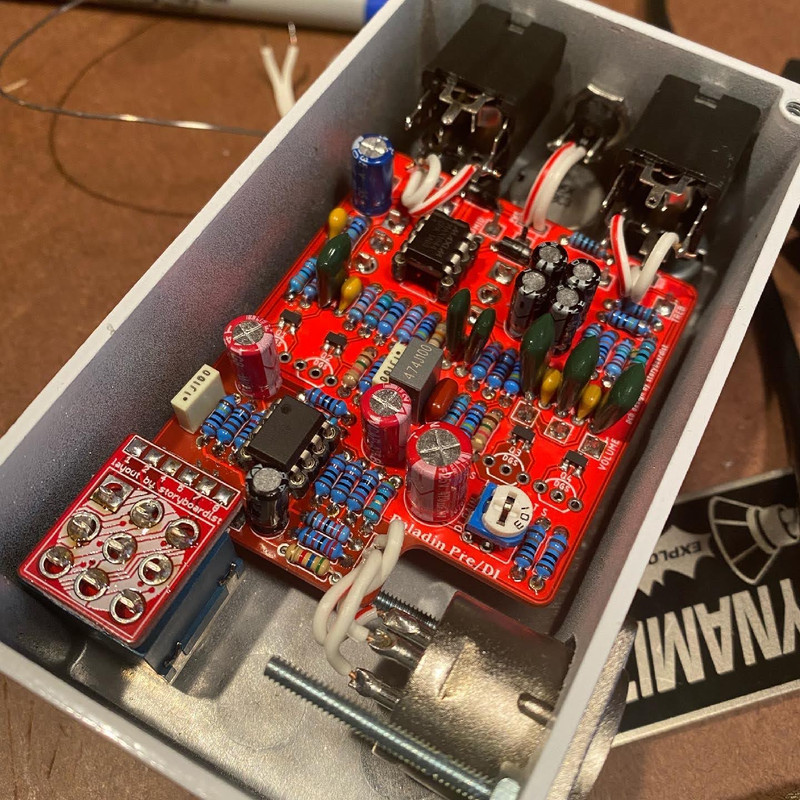
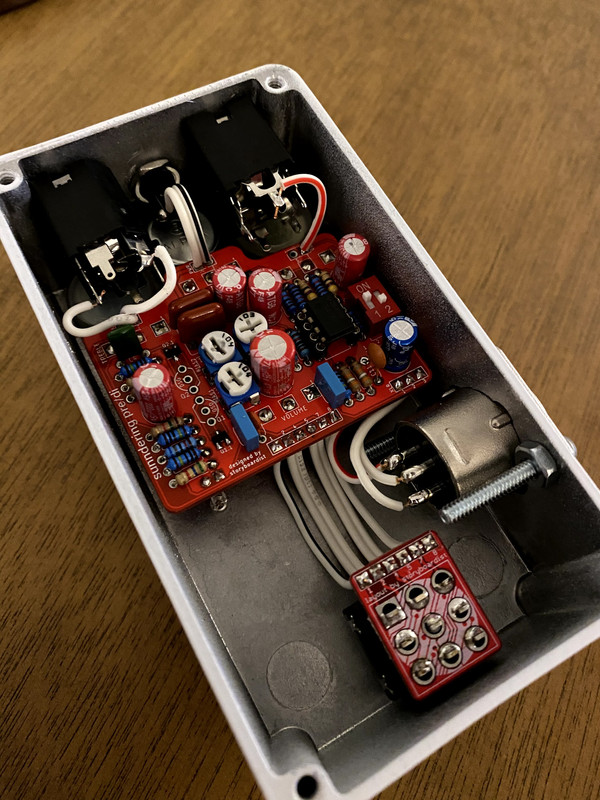
A couple years ago I'd started this wooden enclosure with a bent steel top that's just been sitting on my bench collecting dust, so I made the back cover and a plate for the jacks. I drew up custom layout in Eagle and added Steve Demedash's Incandenza relay bypass. Used my resin 3D printer to make the name badge (which got buggered in assembly  >:( ) and threw on some big ol' chrome/black knobs from BLMS.

An in process shot:


Guts:


Finished:


I'm going to redo the name badge as the screw holes were just a bit off and made the lower edge bend upwards, not to mention gashing the lower line of text with a screwdriver. But he's excited to use and they're going into the studio in a few weeks, so hopefully it'll be a useful tool in that process. Here's their Spotify link if anyone fancies a listen: https://open.spotify.com/artist/6vHP2UiHTuZKRBVhtx2nFe
#12
Build Reports / Sunn Beta Bass preamp - SUNNβEAM
October 31, 2019, 07:21:15 AM
Been wrestling with this off and on (mostly off) for like 2 years. Repeatedly kept screwing up little things, but it's working perfectly now and it sounds awesome. It's the preamp section of the Beta Bass amp in pedal form. On board voltage double/charge pump delivering +/- 15-ish volts, 3-band EQ, lots of headroom and gain on tap.


A few boards are available on my site if anyone wants one.
#13
Build Reports / Barranca Overdrive (EQD Palisades-ish)
October 11, 2018, 06:55:00 AM
Been working on this one a while and finally got it boxed up last weekend. It's my take on the EQD Palisades, but without the boost option, since I wanted to squeeze it into a 125B. The hardest part was the rotary switches, but I remembered the Coda Effects tap tempo trem build that used some mini 1P6T rotaries (which you can get from Small Bear) with daughterboards to board mount them. Now we're cookin'. I ended up adding another option to the bandwidth switch (Palisades has 5) since you can't limit the number of poles with the minis like you can with the large plastic Alpha rotaries. The rest of the circuit isn't that large, so it came together pretty neatly after that. Because of the rotary/daughterboard combo I had to use long leg PCB mount pots to get all the controls on the same level–well, almost all of them. Anybody know if there are longer legged toggle switches? I ended up using some thick solid core wire to get them high enough to get the nuts on. I guess I could have left them short and had an oval in the enclosure for the throw of the switch, but who wants to mill an oval? lol Anyway, I'll stop rambling and show the pics now.

Here's the daughter boards and mini rotaries:


Guts:


Enclosure:


(Used Mod Podge to adhere the graphics. Thanks CJ for that thread detailing that method.)

All buttoned up:


#14
I had some Dirt Transmitter boards fabricated shortly after I traced the original, but finally got time to sit down and build it. Filmed while I was at it, so enjoy guys! If you're interested in a board or 2, check out the for sale section: http://www.madbeanpedals.com/forum/index.php?topic=28265.0


Also, it's hard to solder when you're trying not to stick the back of your head in front of the overhead camera.  ;D
#15
Not a build report, but a dissection report I guess. Grabbed one of these off Reverb a little while ago and traced it this past week. Made a video while I was at it and thought I'd share it with you guys. Etch-able layout on my blog and it's also on my store if you want to go that route (links below).


Schematic:


Layout (click the image):


Fabricated board (click the image):

#16
Build Reports / Speaker Cranker in home brew enclosure
August 29, 2017, 01:45:47 PM
Feels like I haven't boxed anything up in ages. Last night I got some shop time and boxed this little Speaker Cranker clone.


The enclosure started it's life as Bud Box I found on eBay ages ago. The top broke, so I used the base along with some red oak to make a new enclosure. Painted the aluminum with some textured Krylon (I think? I painted it ages ago) spray paint and then black over it. Might need to make a run to Home Depot to get some screws to keep it together. Can't find any good ones in my stash. lol

Here's the guts. Nothing special.

#17
Build Reports / EQD Hoof Reaper clone
February 22, 2017, 12:03:24 PM
Finished wiring this up last night. Three 3PDTs in one 1590BB isn't something I want to make a regular habit, but holy crap does this thing sound good. For those who aren't familiar, the Hoof Reaper is a 3-in-1 fuzz. The Hoof is a modified Muff with germanium transistors and LEDs in the clipping stages. The Reaper is a silicon/germanium hybrid Tone Bender type fuzz. Throw in a Green Ringer in the middle and you have the Hoof Reaper. I finished this at like 10 o'clock last night, and it took a lot of will power to not crank it up. Fortunately I did not wake up my kids (or the rest of the neighborhood). Anyway, well worth the build if your a fuzz addict like me.


#18
Build Reports / Bellows Clone
January 17, 2017, 10:00:23 AM
Before the Holidays I grabbed a used EQD Bellows off eBay. Great sounding dirt box on both guitar and bass, plus soft touch relay switching. Of course before I even plugged it in I cracked it open and took a peak in side. Not too long after I was able to trace it (ignoring the PIC-based relay bypass circuitry). Here's the schematic:


The JFET threw me, so I breadboarded it real quick (with a J201 for the JFET) and it fired right up. I made a layout for my blog and went ahead and built it up on perf to verify it. With the original being in a 125B enclosure, I went ahead and boxed it up in a 1590B with top mounted jacks (or TMJs as Cody and I call them). Smaller footprint FTW. Wasn't feeling all that inspired for graphics, so I just spray painted it orange and painted some flames on there.


For bypass I used good ol' Millenium 2 bypassing with a DPDT (I have a bunch of those lying around).
#19
Build Reports / SS/BS Mini clone for dminner
October 21, 2016, 05:20:59 AM
Here's another labor trade report. Dan did a great job on the enclosure and I just wrapped up the guts last night.


Considering everything ended up off board, things stayed fairly tidy. Sending it off to you shortly, Dan!
#20
Build Reports / Equinox II Reverb
September 14, 2016, 05:54:53 AM
Wrapped this one up last night and I'm really pleased with how it turned out. It's a Valve Wizard Equinox II reverb. Instead of a Belton brick most DIY digital reverbs use, this one uses 2, PT2399s set to different short delay times and is set up for tails (which isn't as useful in a reverb as a delay imho, but still cool). Honestly it sounds much better than I expected, and has more depth than the last Belton brick-based reverb I made. Layout's from my blog, btw. Had a friend who does calligraphy do the lettering and it came out really nicely.