News:

Forum may be experiencing issues.

Main Menu
Menu

Show posts

This section allows you to view all posts made by this member. Note that you can only see posts made in areas you currently have access to.

Show posts Menu

Topics - TNblueshawk

#21
Open Discussion / Twinkies - A SAD day indeed
February 25, 2019, 08:03:09 AM
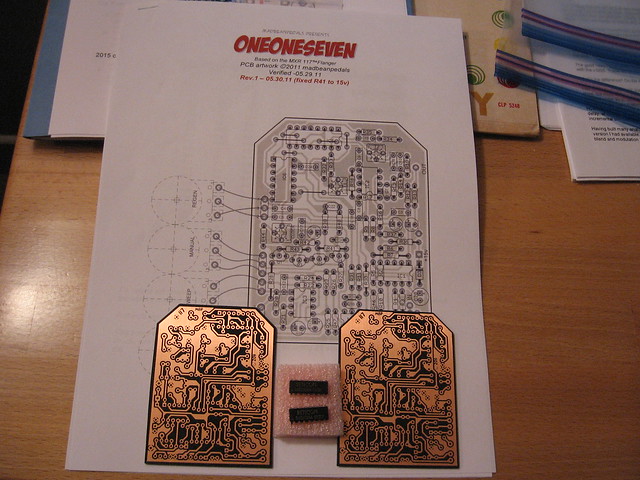
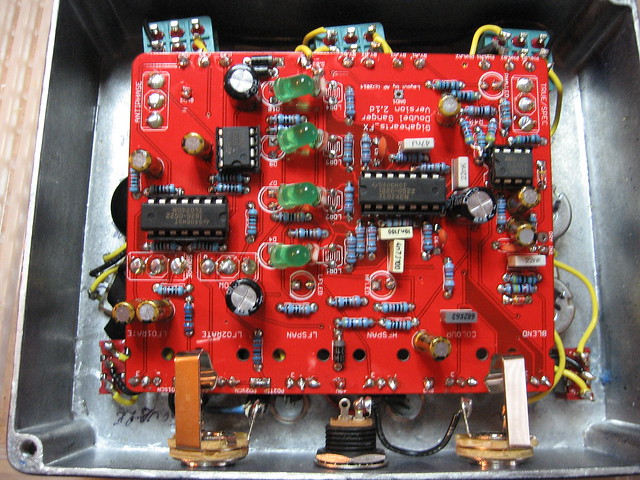
Many thanks to our forum bud Haberdasher for working these boards up for me and in such a timely manner. Guess I'll make twins with these as there is no point having a chip laying around doing nothing.

Thanks Keefe!

#22
Open Discussion / Reticon SAD1024's
February 08, 2019, 10:17:08 AM
I'm sort of piggy backing the other flanger thread going on now but I wanted more eyeballs on my question.

I have two SAD1024's. Is anyone aware of a PCB project out there that employs these? I've searched and have come up empty.
#23
Open Discussion / Leslie speaker
January 29, 2019, 12:11:42 PM
Has anyone ever run up on any plans out there in the webz to build a leslie speaker system?
#24
Open Discussion / Hey Martin pickers
February 09, 2018, 12:02:47 PM
So, I'm thinking about dipping a toe or maybe my foots into the Martin pool. Admittedly I'm not schooled on what I'm looking for other than to say I don't have the longest fingers (hey hey, I have big feet now) and I like smaller body guitars.

In summary, what thoughts might one have with respect to a good Martin, small body, cut away (acoustic/electric, or not)?

I'm guessing someone might be wondering what a price point might be. Let me give a range of $1,500-2,500 for starters.

Thanks for any input you might have. I'm just starting the hunt.
#25
Open Discussion / Gibson amp kits
February 06, 2018, 11:42:06 AM
Is anyone aware of any Gibson amp build docs out in the webz? I'm mostly interested in a GA-40 but I'm not married to it. Any old Gibson circuit might do. I'm just starting the poking around phase if you will.
#26
Build Reports / Various builds
March 01, 2017, 11:43:52 AM
I thought I'd post a few as I still build. Not nearly as much as I used to but after 80 pedals who does  :P 
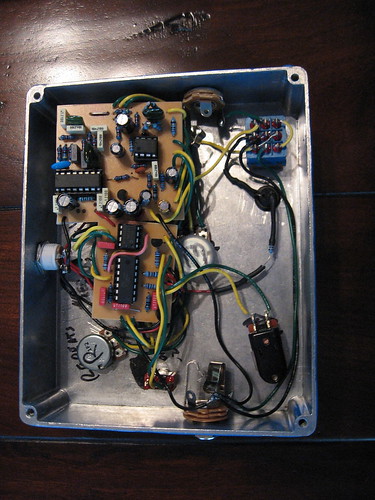
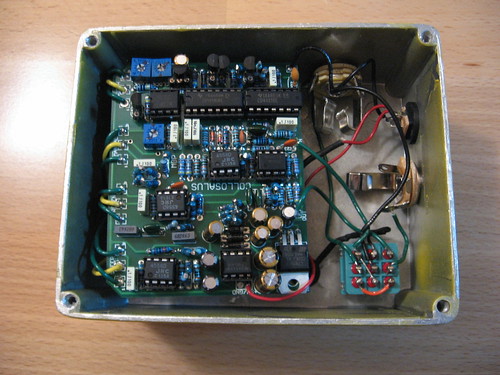
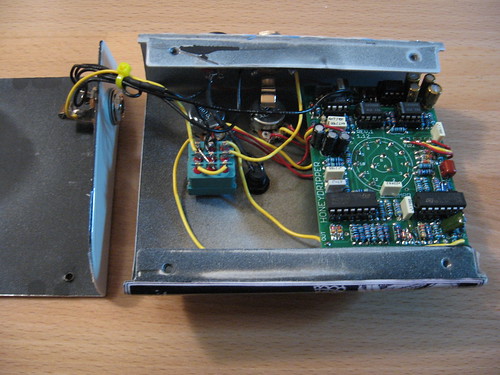
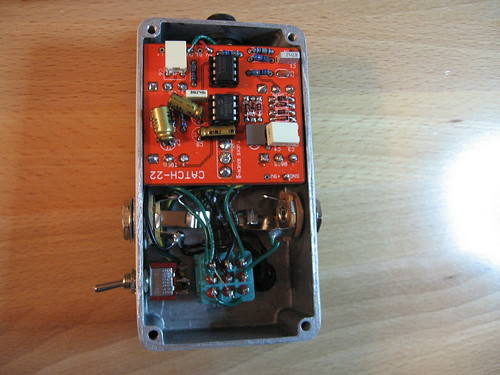
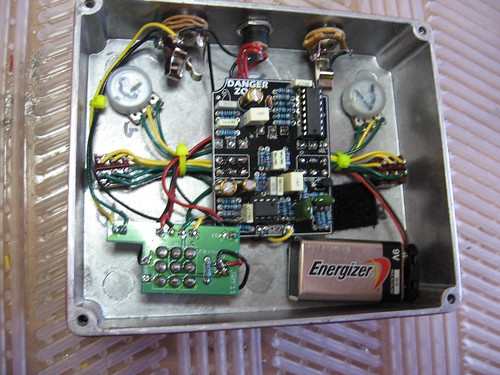
What has waned however is the need to feel compelled to be tidy in that box. 

Harbinger. Who doesn't love some Little Feat  ;D


Rej's The Timmy


Stage Fright. First time I recall tearing a decal. I'm afraid my stock of water slides is a bit old and I may have to toss them and get some new ones.


#27
Build Reports / Danger Zone - The Burglar
March 01, 2017, 11:19:21 AM
I had started this build for a friend that used to work with my wife. He's an old blues guy from New Orleans that I had sold some pedals to over the years and I got to know him a bit on email. He just retired last November. He was in his late 60's and was going to Dairy Queen for a milkshake 3 weeks ago and got T-boned by a piece of human debris who blew threw a red light. I figured the pedal is better than flowers that die in a few days. I buttoned it up Sat morning and after 3 weeks in ICU he died the next morning. Freddie King was one of his favorite guitarists.

Sigh  :(


#28
Build Reports / Doppelganger
April 12, 2016, 12:41:25 PM
Funny how you don't build a pedal in about a year and come back and forget how to do decals right. Shitty decal work but I wasn't about to strip it. Anyhoo......thanks to Ian for a great pedal.


[url=https://flic.kr/p/G3NCjw]
#29
General Questions / Dual gang pot question
March 25, 2016, 06:30:18 AM
So, I'm in that classic dilemma of do I order one pot and pay the shipping as I don't need anything else to order from Small Bear for some projects.

So, on the Harbinger One if I took a dual gang 100kA (instead of the 100kC as called for) and wired it backwards (sort of like I do by accident sometimes) does that get me to the same place? Probably not, but how close do I get to a 100kC effect for the Harbinger?
#30
Open Discussion / Meditation: Anyone into it?
March 17, 2016, 10:04:39 AM
If so do you have a recommended beginner's DVD preferably but audio CD at the very least?

My wife seems to want to check into it and I always have but never have done anything about it really. I'm going to strike while the iron's hot as they say.
#31
Open Discussion / Envirotex tutorial
March 02, 2016, 12:40:38 PM
I haven't posted a ton on here in the past few years but I've noticed some new folks and some trying Envirotex. I did this for BYOC back in the day and thought I might post again for easy access. Sorry for the length but there is more to type when you screw up enough  ;D  
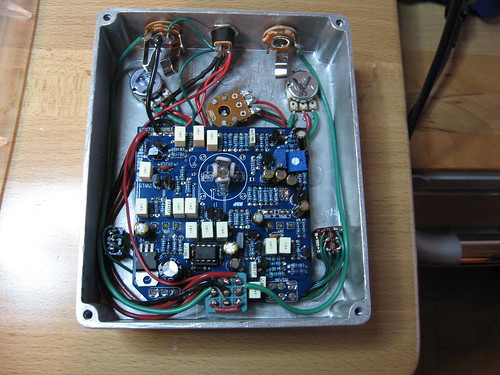
Hopefully it helps a few people avoid some mistakes.

- So in my spare time I thought I'd start sort of a tutorial thread on using this stuff. I think enough people use it now and or want to use it to where hopefully this thread is helpful to some people. There was a real good thread in here but due to some SQL happenings I don't think it reads very well as my posts are gone, people's response to my posts and then my response to their response to my post...er...well whatever. Not that there is not good info in the other posts. Great advice by others in fact. I just thought I'd toss this out there to where it reads a tad better maybe. The ORIGIN for me http://www.buildyourownclone.com/board/viewtopic.php?f=9&t=27837&st=0&sk=t&sd=a&hilit=painted+enclosure+tutorial

I'm hoping it might be more of a living document kind of thing with the others folks who use it chiming in on what works for them. This is by no means a thing of I do it this way and it is the right way. This is how I do it this way after many failures and maybe someone won't make the mistakes I did/do. But, there is a learning curve and like all this stuff we do, what works for you ends up what is best for you.

Maybe if the Mod God's are feeling it, it will become a sticky

So without much ado...

Envirotex or at Home Depot Parks Glaze what is it? It is a two part epoxy. It is just like any other. Put the two parts together and mix thoroughly and it generates heat and you have a set time to work with it and then after that don't touch it. Of the two brands I like Envirotex better. Dunno. It might be the old I think I hear a difference in these IC's when in reality there is not, but it just seems like I've gotten better finishes. It's probably just my self-fulfilling prophecy, who knows.

Where to buy it? Well, where you can and the cheapest you can. You can print off a 40% coupon on line from Michael's and buy it. I go that route mostly. I've gotten it at Ace Hardware which is the best price I've found. It is about the same as Michael's WITH the coupon so the mark up at Michael's is ridiculous. Speaking of markups, try buying it at Hobby Lobby. Ridiculous as well. I have not purchased this on line. Maybe a better deal is to be had especially if you want to go the gallon route.

I've only seen Parks Glaze at Home Depot. It's about the same price as Ace.

The size I typically buy is 32oz's or what is two 16oz bottles. A "good" deal here in the states is about $22-25 bucks. Have no idea how many pours each person will get. Depends on run off and waste that I'll comment on later.  If the stars align in my life I might get 5 pours out of this. If not...well....I don't want to talk about it.

The "jig": So, to do this right you need something to hold the enclosure up off the table as you have run off and drips. Very important is that whatever you do you get it level. If you don't and since this is a self-leveling epoxy it will simply run towards the lower side and you end up with a bare strip on the opposite end. Ask me how I know this. What you come up with is up to you. This link is what I have done which I stole from PMcG No6 ___________. Post pics of what you come up with. I'm all for something better.

I use a small torpedo level to get it just right. I've put shims under the jig before. Have your wife keep her finger under there for 2 hours. Whatever works for you.

The Prep: I put a sheet of plywood over a couple saw horses. Whatever you use make sure it is flat and level or you will play heck getting the enclosure level. Get your little propane torch to pop bubbles. I don't blow although others do. I keep spitting on my pedal and I figure that can't be good. Get something that you will use that will wipe off drips. I use a metal wire tie that you use to tie rebar. I have about a thousand of these things when I built a patio...but that is another thread altogether. I clip off one loop end and I've got a sturdy, thin metal thingy to wipe along the bottom of the enclosure. Use whatever you want. Get you a roll of paper towels. Now, you need to decide how you want to cover these things while drying. Some use cardboard boxes. I used to until I got tired of tiny pieces of cardboard in my finishes. I raided my wife's Tupperware and now am the proud owner of 4 large bowls of one dimension or another. She finally got over it. Flip it over and tack cloth it. No telling what little creatures crawled in there and died in the garage while being stored. I also grab a couple paint cans as in pints or smaller that I use to set the Tupperware on. I want airflow coming in for it to dry quicker. You do not want to have your garage door open unless you like all kinds of stuff in your finish. If at night and it is summer, keep it closed or you end up with bugs attracted to lights which then land on your finish. I don't think the fumes are that bad compared to stains, paints, thinners and on and on.

The Enclosure Prep: I do all my drilling before the pour. I then decal before the pour and I cut out the holes on the decal before the pour. Some cut out the top holes and not the side holes and some no holes. Pick your poison. There are pros and cons to all. One thing I do try to do and be conscious of is prepping the bottom edge. If while painting and if you prime, if you have a lip develop from that, then this epoxy will make that lip bigger. When I sand the enclosure I also sort of hit that edge pretty well maybe to bring it down 1mm or something to help allow for this. Don't know if that works but in my mind it does.

The Taping: This is a critical thing here. The reason you tape is to deal with the issue of having a lip at the bottom of the enclosure.  If you want a fat lip then don't tape along the bottom. But, I use blue painters tape and run it along the inside of the enclosure. Make sure you tape over the little screw holes or you won't like getting the epoxy out of those very much. As I'm typing I realize pics would really help here but I don't have any handy. Next you have the issue of jack holes. The issue here involves the fact as you pour down the sides the epoxy tends to want to develop flow lines around the jack holes. I'm guessing here but my take on that is a lip form above the first half of the hole. Since this stuff dries over time is slowly flows down. But it hardens. So little by little a lip will form and the excess flows around each side of the lip and you get these flows lines if you will. What seems to have worked very well for me and most others I've read about is you have to take about 5 minutes out and cut little round circles the size of the DC and in/out jacks and tape it to the hole. The idea is to barely cut that circle to where it just grabs the edges of the hole. The notion is to have that epoxy flow right over the top of it as those it is a solid surface and eliminate the flow lines. I'm able to have this come out good 90% of the time roughly. Finally there is the issue of "pillowing" on top. Frankly, I don't mind it. Because of the empty holes the epoxy runs through the holes so you end up with a downward slope around the holes.  I think it's kind of cool or maybe that is what I tell myself. The footswitch hardware and most knobs do a great job of hiding this. LED's is where you see it more I suppose and toggles. The only way to have no pooling is to not cut out your decal in advance. Or, I guess you could tape it underneath as well. I don't do this and it requires another technique. I would rather let some others comment on how they handle that. It will require cutting and or drilling after the epoxy has set up.

The Mixing: What I do is go to Walmart, or for you corporate haters go to your local mom and pop, and get some of those PGA cups we all used in college, the red and blue cups. I like the ones that are ribbed inside the cup. It allows you to measure each bottle. It is extremely important to nail the measurement of each component at 50/50. It is equally important to stir completely. I've made the mistake of forgetting this step and I ended up with a sticky forever enclosure with divots. Had to strip her down. I use paint stirrers that I grabbed 30 of when the Home Depot paint dude isn't looking. They are free but they don't like you taking their stuff unless you buy a gallon. Wipe the thing off or what is on the end of that stick, splinters, dirt, hair etc... or it will end up right in your finish.  Now pour one cup into the other. Stir for about 30 seconds. Make sure you dig down and get the bottom mixed.  Nice steady swirls. Now pour into the other cup. Same deal. You have a choice here. The "harder" you stir the more air bubbles you generate and therefore the more that must pop. I try to mix good enough but try not to get a ton of air bubbles too.

The Pour: I use a tack cloth to wipe off dust. Go back and make sure you didn't knock it out of level when done. Now, here is where you might get all kinds of different techniques I think. Some might pour in swirls on top (I think the instructions tell you to do it this way) Some might put a big blob and watch it move. Some move it with a stick or something. I have done this in the past and used those throw away black spongy brushes. If you use this take some painters tape and tape the end and pull it off. It takes off fuzzies or whatever. Bonus tip here: Do this same thing on paint rollers when painting your house. Should you pour the top first or the sides? Advantage or disadvantage? What I seem to do mostly is hit those sides first. Go all around them. Pay particular attention to the corners as the epoxy wants to split there and flow away from going down the entire length of that corner. When you get to the side jack holes I flood it in order to get it run right over the top of those holes.

Let me make a quick comment on waste. I guess I'm just not good enough as I end up wasting a lot. If you waste very little then more power to you. Develop your style and go with it. I just want to get good coverage on the sides and for me this ends up in waste. Some like to take something and pick up the waste while wet and put it back on there. I don't. I worry about picking up trash too much to do that. Anyway, whatever works for you.

So when done with the sides I hit the top. I don't like taking something to move it around. I've done it but I guess I just pour and let it do its thing. I will go back and forth in small strips and let those strips close up with each other. Pour a dab here and a dab there as I need. Stare at it. Make sure you covered it all. Then I go back and pour over those sides one more time. Again, the sides are the main issue using this stuff. From there the first thing I do is check out the bubbles. If you want to blow, blow. I fire up the propane torch and get about 9 or so inches and fairly quickly go across the tops and sides. You will see the bubbles pop. ALERT:  Mistake # 79 or thereabouts. If you lay that torch on there either too long per pass or too much (usually the case with me) it create a "skin" if you will. In other words it dried to fast on top. You do NOT want this. If this happens, when you go to puncture the LED holes while wet, as they tend to close up, this skin pulls if you will. It will dry with the "pull look" to it. It's not the worst look but it's not the best. So if blowing is your bag, blow on it. Just don't hang a big ole hocker on it.

In case you are wondering I think bubbles left in there are kind of cool. I've done this on purpose on the bottom plate before. Cool effect I think.

Anyway, the next thing I do is take my metal "stick" and run it along the bottom of the enclosure trying to take off the excess. I kind of tilt that wire tie up some in order to take a little more off as I go around since it will keep draining for an hour or so I guess. Wipe off with paper towel. Next up I puncture any holes on top that are closed off. This is usually toggle holes and LED's. Sometimes it is pot holes. I use my wire tie,puncture and pull up and wipe off with paper towel. Repeat as necessary.

Then I ever so carefully pop my lids over everything. Now, if your tape job is superb and you just nailed it you are likely done. But I wait 15 minutes. I go back and run my wire tie along the bottom to again try to keep that lip down. Puncture anything on top that might have closed up and the lid goes back on. Done...for me. I know some do it for 30 minutes this same routine. I think when you get to 30 minutes you are playing with fire here. But again, you will develop what you want to do.

Lighting: I have a 1000w Halogen light that I use. You will want good light or you will be amazed at what you miss without it. You will be squatting down looking at this thing within inches trying to see bare areas etc... especially on the sides.

Quick comment on clothes. As you can see you will be peering over this thing a lot in the beginning. If you wear a wool shirt I hope you like wool fibers in your enclosure. If you have a beard and you were out until 4:00 a.m. the night before and didn't brush that thing I hope you like beard hair in your epoxy. If you are going to rock it in the nude...well...you know where I'm going there.  I wear nylon type shirts and shave my forearm hair. Just kidding.  No cotton balls falling off that. No fabric hairs etc... Same precaution as one would take if you were nitro'n a guitar for example.

The Cut: So you've spent all this time preparing and doing the deed. Now it's time to cut the tape. Why mess it up here so this is just as important. First up is timing. When? Well, you might get some different answers here too. My take is that you have to grip that enclosure as you tear tape and shave epoxy. I like to wait 72 hours. I've done it in 48 and left my fingerprints in there. After 72 hours I have never left my fingerprints  in there. At this stage it is not totally cured and I find it easier to work with. I've waiting a week and it is more "brittle" when it comes to shaving some holes. I still like it just a tad "soft" so to speak. I tear the tape off around the inside. Don't worry about leaving some epoxy on the lip at this stage. Next up is getting the jack holes  open. I push with a finger from the outside inward. It usually breaks loose and I just sort of pull it out. NEVER push outward towards the outside of the enclosure. Next up is I'm shaving around the bottom edge with a very sharp razor blade knife. Be careful. You run the risk of running that knife across your finger/hand or worse along the outside of that enclosure. Ask me how I know both of these. Next up jack holes. I have a very small blade knife that is a small razor blade type knife. I cut around the holes carefully. For the in/out jack holes with the hardware being installed you have a small margin for error here. The DC jack...not so much. Go slow and careful. I dry fit the parts as I go for as soon as they fit in the hole I'm done. I then check out the top holes .Same deal here. Cut slow and little by little around the holes. Test fit. Done.

Comment on drilling. I think some dudes like to drill around the holes to clean off the epoxy. Go for it. I used to. I quit because on occasion it would pull up that epoxy around the hole and then you are screwed. Hopefully a knob or something covers it up. If not, bummer. I've stripped back down a few enclosures. This is my issue with not cutting out the decal and then drilling. I don't want to take the chance. I know Juan Solo and Maurader have a cool technique for dealing with this over at Bean's. I may have to try it one day. I would rather them comment or you can search over there.

From here put it together. Or if you are like me it sits there as you already have another build that isn't working that you must get working due to a severe OCD condition.

Sorry to be so verbose. I know I'm forgetting something to boot but I think I'm contracting carpal tunnel so I'll stop. It sounds awful if you read it. But it is not. Like anything it will just become a process that you get used to and perfect hopefully. From the time I first tape to the time I put the lid on and am done is maybe an hour.  I try to do a few pours at a time. I don't like to do more than 3 pedals as you are then playing with Father Time. Like Mother Nature, Father Time doesn't want to be messed with. The cutting/shaving, 10 minutes maybe.

Please, for all those other folks that do this jump in. Comment on what you do and or do differently. If you don't agree with something, I don't care. Mention how you do it differently. What works for one may or may not work for the other. 

Lastly, sorry for my grammar.
#32
Open Discussion / Faceplates: Amp
April 06, 2015, 11:22:18 AM
So, does anyone have any sources for an amp faceplate?

I found this one on line but I thought I'd poke around a bit more   http://amplates.com/welcome-to-amplates-com/faceplates/

I could do a poor man's "faceplate" and water slide decal it but I don't know if that is the direction I want to go. It would be cheaper to be sure.
#33
Open Discussion / Ok...come clean...
February 20, 2015, 10:57:16 AM
Which one of you dudes bought the 54 LP for $335,500? Don't be shy. Step forward.


1954 Les Paul Gibson guitar sells for $335,500

The 1954 Les Paul Gibson guitar known as "Black Beauty" has sold at auction for $335,500.

Guernsey's auction house says the six-string instrument with gold-plated hardware set the standard for other Les Paul Gibson guitars.

Paul was a jazz, country and blues guitarist. He made frequent modifications to his basic guitar over the years, refining the sound.

Paul, whose hit songs include "How High the Moon," played his instruments in concerts, recordings and on the "Les Paul and Mary Ford" television show. He died in 2009.

There was no pre-sale estimate for the "Black Beauty" guitar, and Guernsey's could not provide the name of the buyer.

The auction record for a guitar belongs to the Fender Stratocaster that Bob Dylan played at the 1965 Newport Folk Festival. It sold for $965,000 in 2013.

Paul collaborated on his original design with Gibson after the guitar maker approached him about making an electric guitar bearing his name.

The auctioneer calls it the most significant electric guitar ever made.

Years ago, Paul gave the instrument to his friend, guitar technician and builder Tom Doyle of Wantage, New Jersey.

Guernsey's president, Arlan Ettinger, said the Les Paul guitar is considered a "Holy Grail" among musicians because it gave birth to thousands of instruments that bear his name.
#34
Open Discussion / Guitar purchase advice
February 11, 2015, 06:02:20 AM
So there is a guy at work who wants to get back into playing. I know him a bit but not a lot. He says he wants an Epiphone hollowbody. He is looking in the $300-400 price range to start out. Going to Guitar Center....of course.

Any suggestions? I'm really not plugged into the guitar market so much to give him great advice.

I did ask if he was going to upgrade or mod it and he said it's possible but reading the tone of his voice I doubt it.

Thoughts?
#35
Open Discussion / Walter Trout...very sad
March 20, 2014, 06:28:00 AM
http://www.youcaring.com/medical-fundraiser/walter-trout-needs-a-new-liver-you-can-help-/151911

Not sure how many Trout fans there are but I'm a big one. Life is cruel sometimes.
#36
Build Reports / Born to D'Lay
October 21, 2013, 07:01:01 AM
I really should spend more time playing insteasd of building but I digress

This is guitarpcb's D'Lay with TT. I've never used TT and frankly find myself lost but that is because I have spent very little time with it. One day though...on day....!

Steppenwolf fans?

Another mess in there


#37
Build Reports / Eat a Geek: Warning Rat's nest
October 21, 2013, 06:56:36 AM
Couldn't come up with a good name for these 3 so I went with Eat a Geek. Some may know Geekmackdaddy over at BYOC. The first circuit is his Geekdriver. The second is a Myton Blonde from Guitarpcb and all that finally goes into Culturejam's Neptune which is just a straight up sweet delay IMO.

Why such a mess? I could ramble for 2000 words on everything that went wrong with the enclosure, decal, circuit that would never work that I pulled, and on and on. You ever spend so much time messing with something that when it finally all works you don't give a rat's rear what the inside looks like? Well that was this one  >:( :-[


Hide the wife and kids


#38
Build Reports / Collosalus and Pork Barrell
October 18, 2013, 12:12:21 PM
The Collossal


Porktwistle: Bass players unit


#39
Build Reports / Honey Pie
October 15, 2013, 07:41:18 AM
Any Humble Pie and or early Peter Frampton fans? No? Bummer.

Bean's Honeydripper. I got this Marshall amp switcher from someone here maybe a year or more ago. The name escapes me though. It didn't come out perfect as I didn't take into account the different edges that would show but I guess I'm too lazy to go back to perfect it.


#40
Tech Help - Projects Page / Pork Barrel V2
September 10, 2013, 08:18:31 AM
Howdy fellers. I've got an old PB board from 2010 I think it is. Version 2 anyway. Can't seem to get it to chorus. So here we go with what I have thus far. Ran out of time this morning before heading to work but I have some voltages at least.

First, bypass is good. Stomp on the FS and signal comes through fine. But, nothing I do with the knobs has any effect. I moved the trimmer ever so slowly and get no change in the signal. Now this old version has 3 SPST toggles. Two of the toggles do nothing when switched meaning the signal flows through just fine no matter which posistion the toggle is in. Curiously the Vibe toggle when switched cuts the signal off completely. Switch back and the signal is clear.

I doubled checked IC orientation, trannie orientation and diode orientation. I didn't have time to check all resistor/cap values this morning.

I also reflowed all joints (removing IC's of course). Checked under the mag glass for any bridges - none. Double checked my wiring and it looks good.

So on to the voltages: IC's purchased from Small Bear. All trannies are 5008's

IC1 4558

1 through 3: 3.48v
4: 0
5 through 7: 3.48v
8: 9.47v

IC2 TL062

1: Fluctuates 2.47-6.99v
2: 4.76v
3: Fluc's 3.6-5.75v
4:0
5 and 6: 4.75v
7: Fluc's 3.71-5.6v
8: 9.47v

IC3 MN3101

1: 9.36v
2: 4.79v
3: 0
4: 4.82v
5: .30v  ??
6: 8.2v
7: Fluc's 2.97-3.21v
8: .62v    ??

IC4: MN3007

1: 9.37v
2: 4.83v
3: 2.77v
4: .63v
5: 0
6: 4.79v
7: 9.41v
8: 9.41v

Trannies: All these read C,B,E in order

Q1: 2.52, 2.98, 9.46
Q2: 6.28, 3.32, 9.46
Q3: 2.69, 3.18, 9.46
Q4: 0, .40, 7.90-8.12 Fluc's
Q5: 3.15-4.46 Flucs, 3.65-4.95 Fluc's, 9.37

There are a few odd low value or what appears to be odd and low but I'm not sure.

Anyone have any thoughts? I am guessing that this PB is not one where the trimmer is so sensitive that there is that one tiny sweet spot that you have to hunt and find....I hope as I couldn't find it moving every so slowly on the trimmer.