
This one is the defintive cover of Bohemian Rhapsody.
- Welcome to madbeanpedals::forum.
This section allows you to view all posts made by this member. Note that you can only see posts made in areas you currently have access to.
#2191
Build Reports / Re: Fat Bottomed Girl (70's naked lady content) & Phase Your Own Universe
March 16, 2013, 09:50:53 PM #2192
General Questions / Re: how do you wire 4 pedals together?
March 09, 2013, 09:00:00 PM
Hi Dan,
That style of jack is grounded by way of the enclosure to the input jack's sleeve-ground connection. Get yourself some inner-toothed lock washers to put on the jacks inside the enclosure, crank down the nut and you've nothing to worry about, (unless you're using cheapy jacks that don't take kindly to being tightened). If you're using a jack that insulates the sleeve from the enclosure or a plastic enclosure then you will need to connect the output jack sleeve to the input's or to another ground point in the build.
dave
#2193
Tech Help - Projects Page / Re: Where to Buy Diode Sockets?
March 05, 2013, 07:32:35 PM
Where i need to be able to change components topside of the pcb i've sometimes used flea clips which will take any lead size out there. Need a bigger component footprint but work well to be able to tack in the component or switch them out. Also great for attaching leads to boards. I'm sure i got mine from Small Bear but i'm having trouble finding things in the newly arranged SB website so no luck so far.
dave
dave
#2194
General Questions / Re: Alpha 3PDT Source?
March 04, 2013, 02:00:16 AM
Thanks Jon, they do look rather cool... then there's that rarity of use out there that's always an attractive feature, likely to change as thet become more widely available. Was thinking of trying the PCB lug version once i run out of the big blues i have on hand... looking good.
Take care!
dave
Take care!
dave
#2195
General Questions / Re: Alpha 3PDT Source?
March 04, 2013, 01:07:16 AM
I've only had experience with the Alpha dpdt's from Small Bear which i really like for their short plunger and compact body. In the pictures it looks like the 3pdt's too have the short plunger but can't tell much about the size of the body, how do the Alpha's body compare to the standard issue 3pdt's that are out there? Overall length?
Thanks
dave
Thanks
dave
#2196
General Questions / Re: New DC Jacks :(
March 01, 2013, 04:25:27 AM
Mode, part number 31-134M-0
http://www.mode-elec.com/Products/dc_plugs_jacks(26).pdf
If you're in Canada Electrosonic stock them, (also great prices on Hammond enclosures), they do ship to the states. Have a local, literally, dad and daughter electronics shop that also stock them, not cheap there but in a pinch...
http://www.e-sonic.com/acc/home.aspx
dave
#2197
Build Reports / Re: NPSITBSMNDCTCD
February 27, 2013, 07:24:55 PM
Jon, after you stuff the ceiling, cover and seal it with some 6mil plastic sheeting. If air can leak through the sound will get through as well so you need to caulk around the edges and make sure any openings for electrical boxes or whatever are sealed to the plastic covering. Coming along nicely, about he size of the corner i get to mess about in.
Take care,
dave
Take care,
dave
#2198
Open Discussion / Re: Breadboard pots
February 27, 2013, 07:16:09 PM
I can't take credit, not my idea or picture, i only borrowed/stole them, thanks to Andrew (Electrosonic at diystompboxes) for sharing his solution!
dave
dave
#2199
Open Discussion / Re: Breadboard pots
February 27, 2013, 04:53:18 PM
This was posted over at diystompboxes and i'm borrowing this idea for pots. Had tried the trimmer route and a few others and this is the handsdown winner for me.
dave
Quote from: electrosonic on February 05, 2013, 06:16:42 PM
Andrew.

dave
#2200
General Questions / Re: PCB etching adventure...
February 27, 2013, 01:13:48 AM
If you have a Dremel or other small rotary tool get yourself a diamond cutoff wheel, goes through like a hot knife through butter. (don't forget the dust mask/respirator and eye shield.)
dave
And those boards look like they turned out really well. Now it's easy.
dave
And those boards look like they turned out really well. Now it's easy.
#2201
How Do I? Beginner's Paradise. / Re: Setting vero layout: did i do this wrong
February 24, 2013, 03:43:27 AM
I'm just starting off on this vero/strip board journey as well and really enjoying the simplicity of it, hands down winner over perf. As was mentioned, tagboard has a couple tutorials that are a great help in getting started not to mention a huge library of verified layouts to draw from.
http://tagboardeffects.blogspot.ca/2012/04/vero-build-guide.html
http://tagboardeffects.blogspot.ca/2012/09/vero-layout-guide.html
dave
http://tagboardeffects.blogspot.ca/2012/04/vero-build-guide.html
http://tagboardeffects.blogspot.ca/2012/09/vero-layout-guide.html
dave
#2202
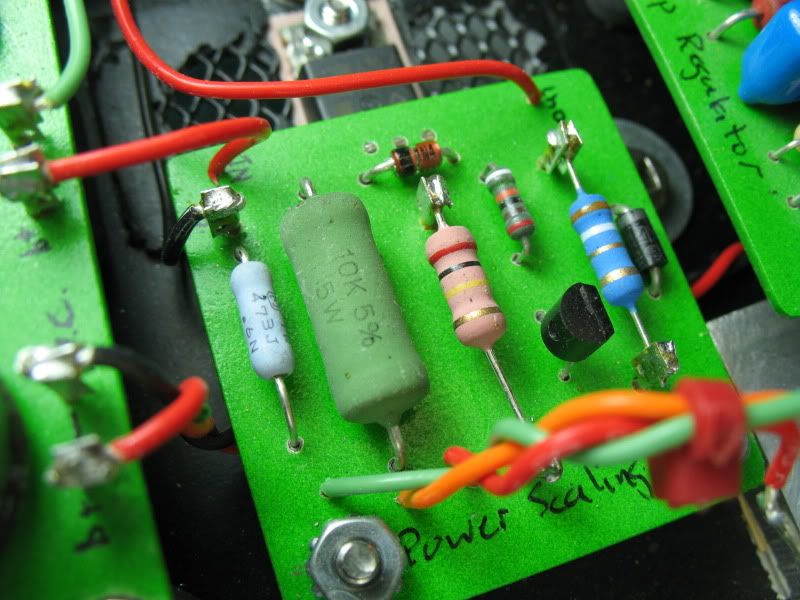
Build Reports / Re: Run Off Groove Omega
February 22, 2013, 01:38:55 AMQuote from: alanp on February 21, 2013, 03:26:12 PM
I think you're the only other person who uses india ink on this board

How do you go about using it? I'd only ever used it, before this pedal, with dip pens to try and label and that's going to require more practice/play. So far seems i need to wait until lacquering to do ink, ontop of acrylics it spreads and seeps so you lose the controlled lines.
dave
#2203
Build Reports / Re: Run Off Groove Omega
February 22, 2013, 01:31:45 AM
Thanks again folks!
Wouldn't wear well if left unprotected so worked well in this instance since i was wiping off most from the slick foil just wanting it to remain behind in the various divots and physical impressions i'd made. Dumped over a bottle on the workbench and that's wearing well as the bench sucked it up like sponge. Once the isolation coat was added (GAC200) over the ink, any new inking does bind well and is not very easy to remove. All the inked/painted surfaces are protected with the usual lacquer so i expect they'll be fine but never tried this before so will have to wait and see.
dave
Quote from: neiloler on February 21, 2013, 03:37:21 PM
Does India ink wear well? It seems like you could get more mileage out of it by using a little bit of enchant here as there to rough up the surface so that the ink has more surface area to bind to...?
Wouldn't wear well if left unprotected so worked well in this instance since i was wiping off most from the slick foil just wanting it to remain behind in the various divots and physical impressions i'd made. Dumped over a bottle on the workbench and that's wearing well as the bench sucked it up like sponge. Once the isolation coat was added (GAC200) over the ink, any new inking does bind well and is not very easy to remove. All the inked/painted surfaces are protected with the usual lacquer so i expect they'll be fine but never tried this before so will have to wait and see.
dave
#2204
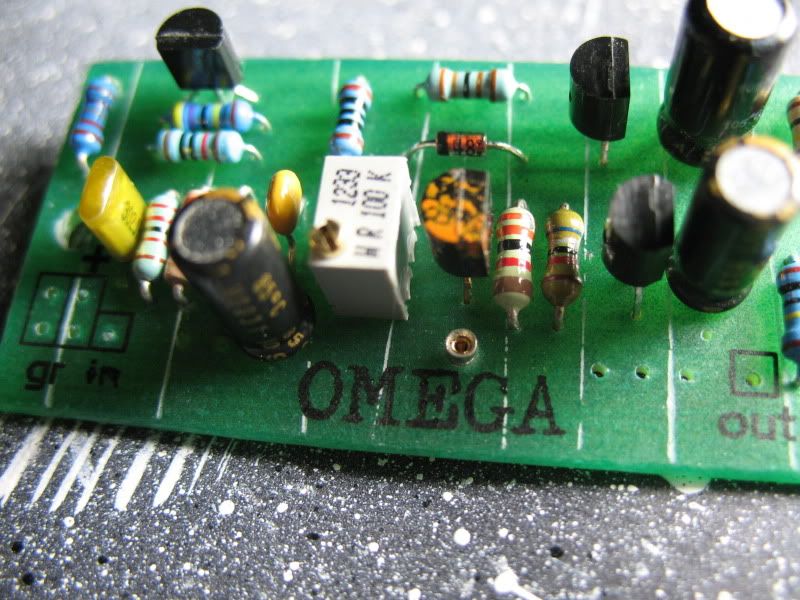
Open Discussion / Re: soldering on etched boards
February 20, 2013, 11:31:52 PMQuote from: 9Lives on February 20, 2013, 07:53:45 PM
Where did you get that clad?
Hi Grant, That's more then likely just MG Chemicals presensitized pcb, came from the light proof envelope of odd sized leftover bits of various brands. They all come in varying shades of ugly unlike regular copperclad that you can sometimes score in some cool colours as well as almost transparent. I paint the tops of the boards with acrylic paints (never black) to make them look better, pointless but makes me happy. That ones painted with Pthalo Green transparent paint, stamped and then did a toner transfer to add some legending. Sometimes do a full silkscreen type print with toner transfer.

dave
#2205
Build Reports / Re: Run Off Groove Omega
February 20, 2013, 04:39:25 PM
Hello guys/gals(?), Thanks for kind words!
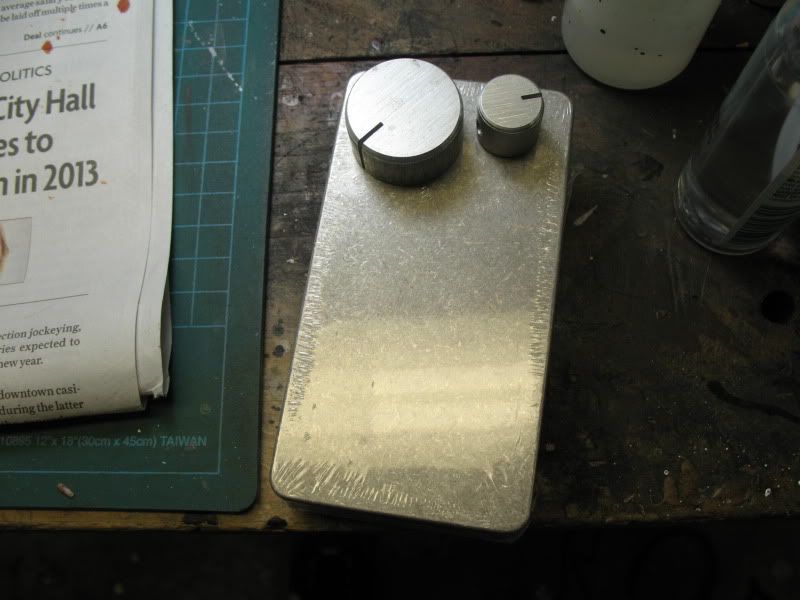
Pretty simple really and i'll add here not sure how well this finish will stand up to abuse but in this case some abuse would give it some character.
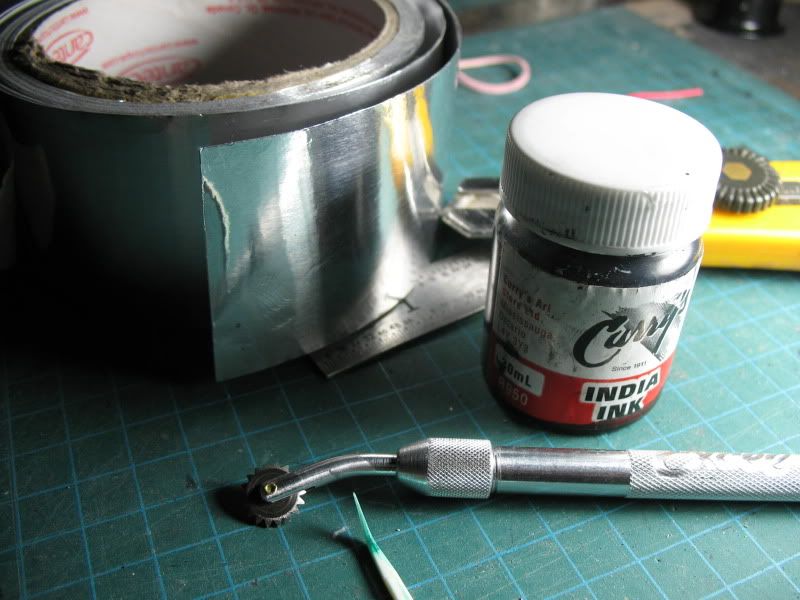
Tools; aluminum duct tape, embossing wheel, steel rule, heavy razor knife, cutting matt and India Ink. You cut out a well-squared, random sized rectangle of aluminum tape, 'rivet' the perimeter with the embossing wheel working on top of the soft cutting matt, peel the back off the tape and stick it to the enclosure. Continue cutting, embossing and sticking until the enclosure is covered, that's it.. then you get to play.
Added more texture to the individual panels by pressing files and rasps into the tape, used the thread of screws and bolts to leave an impression, hammer and a nail, anything handy that would leave an impression in the tape. Rolling a round rasp over the tape left an interesting pattern, used that for the back. The punching of letters was nasty, the Hammond enclosure was much harder then expected and needed a far harder whack to leave a good imprint then i was willing to deliver. Should have done the lettering to the tape before putting that panel on the box. At this point burnished the tape down with a brayer to ensure good contact with the enclosure.
Once textured, painted it all over with India Ink, let it dry a bit then wiped it off with paper towel, do that a few times until you get what you want. At this point i'll do an "isolation" clearcoat with a mix of GAC200/Airbrush Medium to protect the ink layer so if i don't like what goes on next i can hopefully remove it without messing up the earlier efforts. (The first go round i reached a point where i didn't like how it was going so used acetone and a scrub brush to take it back to the undressed tape.) After the ink- it's paint splatter, stencil, stamp, rub the paint around with your fingers, wipe it off before it's totally dried, (working one colour at a time let it dry before doing another so you don't get mud.. unless of course that's what's called for), sand it chew it up some more, there's some very old dried out dry transfers buried on there, anything goes really... Lots of isolation coats done through the colouring process.
Knobs and bezel thrown in a can of screws and bolts, shaken up, not enough damage so used files and sandpaper to chew things up more. Follow that with the India Ink treatment. Those bits and the enclosure are lacquered.
Switch plunger-cap got the abuse and India Ink.
Brass hardware, ammonia fumed.
Switch's and jacks' nuts/washers, propane torched.
Thanks guys!
dave
Pretty simple really and i'll add here not sure how well this finish will stand up to abuse but in this case some abuse would give it some character.
Tools; aluminum duct tape, embossing wheel, steel rule, heavy razor knife, cutting matt and India Ink. You cut out a well-squared, random sized rectangle of aluminum tape, 'rivet' the perimeter with the embossing wheel working on top of the soft cutting matt, peel the back off the tape and stick it to the enclosure. Continue cutting, embossing and sticking until the enclosure is covered, that's it.. then you get to play.
Added more texture to the individual panels by pressing files and rasps into the tape, used the thread of screws and bolts to leave an impression, hammer and a nail, anything handy that would leave an impression in the tape. Rolling a round rasp over the tape left an interesting pattern, used that for the back. The punching of letters was nasty, the Hammond enclosure was much harder then expected and needed a far harder whack to leave a good imprint then i was willing to deliver. Should have done the lettering to the tape before putting that panel on the box. At this point burnished the tape down with a brayer to ensure good contact with the enclosure.
Once textured, painted it all over with India Ink, let it dry a bit then wiped it off with paper towel, do that a few times until you get what you want. At this point i'll do an "isolation" clearcoat with a mix of GAC200/Airbrush Medium to protect the ink layer so if i don't like what goes on next i can hopefully remove it without messing up the earlier efforts. (The first go round i reached a point where i didn't like how it was going so used acetone and a scrub brush to take it back to the undressed tape.) After the ink- it's paint splatter, stencil, stamp, rub the paint around with your fingers, wipe it off before it's totally dried, (working one colour at a time let it dry before doing another so you don't get mud.. unless of course that's what's called for), sand it chew it up some more, there's some very old dried out dry transfers buried on there, anything goes really... Lots of isolation coats done through the colouring process.
Knobs and bezel thrown in a can of screws and bolts, shaken up, not enough damage so used files and sandpaper to chew things up more. Follow that with the India Ink treatment. Those bits and the enclosure are lacquered.
Switch plunger-cap got the abuse and India Ink.
Brass hardware, ammonia fumed.
Switch's and jacks' nuts/washers, propane torched.
Thanks guys!
dave